Homestead Herbs & Healing | holistic living
  • Start Here
  • Homestead
  • Herbs
  • Healing
  • Recipes
    • Breakfast
    • Main Course
    • Dessert
    • Snack
  • DIY
  • Minimalism
  • About Me

  reading time: 7 min


Episode 15.

As with many things regarding the human body (weirdly) there is a stigma around using enemas, and I totally understand this.
For the longest time I was grossed out by – even scared of – the idea of taking an enema. During my 2 week at-home Ayurvedic cleanse I had successfully avoided the enema, but I knew that I couldn't avoid it any longer once I started my 3 month (!) Sacred Woman program by Queen Afua, which starts off with an in-depth (literally) cleansing of the internal organs – kidneys, colon, and womb.

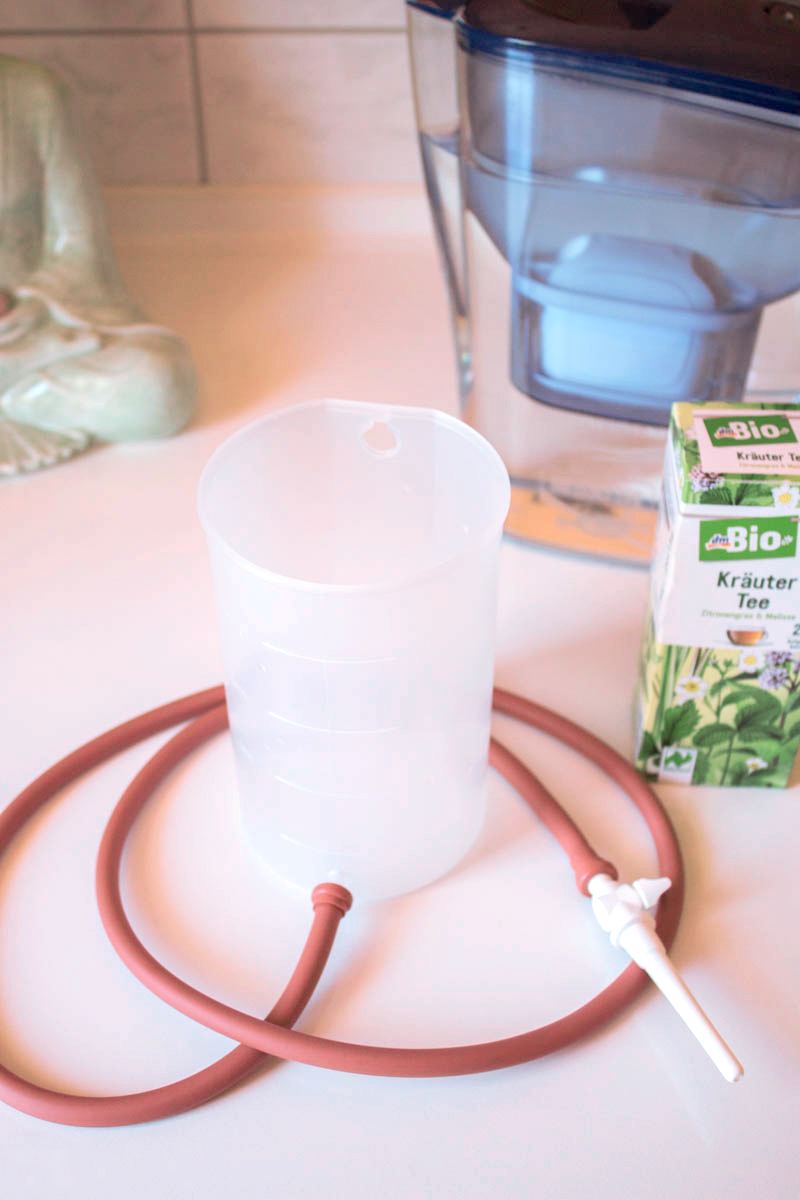
Basically, enemas are rectal injections of fluid (usually warm water or tea) into the large intestine intended to cleanse your colon and stimulate the emptying of your bowel. While it should not be employed regularly, it is a popular practice to prepare for a cleanse or detox such as the Panchakarma Ayurvedic cleanse, therapeutic fasting or the Sacred Woman program.


DISCLAIMER:
I am not a physician, and the information provided on this blog is for informational purposes only. No material on this site is intended to be a substitute for professional medical advice, diagnosis or treatment. Always seek the advice of your physician or other qualified health care provider with any questions you may have regarding a medical condition or treatment and before undertaking a new health care regimen, and never disregard professional medical advice or delay in seeking it because of something you have read on this website.


 reading time: 16 min


In honour of #earthmonth and this past Earth Day on 22/04/22, I am going to share with you 10 versatile multi-purpose foods in today's blogpost that you can use in at least five different ways such as for cooking, cleaning, body, and more – with the total of household and beauty uses for the listed items summing up to 100! 🤓 This blogpost was inspired by Meghan Livingstone's article on 6 Multi-Purpose Foods For Cooking, Cleaning & Body.

As you all probably know by now, I'm not only a huge foodie, but also a big believer in minimalism and a zero waste or low waste lifestyle. This blog post is supposed to remind both you and me of all the wonderful versatile ways to use everyday food items that you probably have sitting in your cupboard already!


    reading time: 3 min


We have a long history of baking and "decorating" Easter buns with my parents on Easter Monday. It's a tradition that we take very seriously 😉 Several years back I shared our tried and trusted recipe (yeast buns) that we have been using for the past ten years or so. However, before switching over to a yeast dough we always used to make our Easter buns using a German Quarkölteig, a dough made with curd cheese / quark and oil.

So for some reason I really felt like doing a vegan "curd cheese" & oil dough this year instead of our usual yeast dough. This recipe makes for smaller and oilier buns than the yeast version, but doesn't require any rising time, so it's quicker to make and you don't have to get up at the crack of dawn on a Sunday to prepare the bread rolls for breakfast 😉


These curd cheese buns are:
egg-free
dairy-free
wheat-free
sweet
soft
fluffy
moist
easy
& satisfying


These cute little buns are also a fun addition to any Easter or Ostara breakfast, to celebrate spring and its corresponding symbols like rabbits, eggs, chicks, lambs, flowers, butterflies, beetles etc. (Though my signature bun became the Cheshire cat for some reason, haha!) But they are of course also perfect for just any regular Sunday breakfast.

   reading time: 5 min


Like Dany's Dragon Eggs that I shared with you last week, this soft, sweet, sexy challah is another recipe that I've been waiting, even yearning to make for weeks, almost months now! 🤪

Sounds a bit crazy?

Yep, that's me!

(Did I just describe a baked good as "sexy"? Anywho ...)

I used to despise having to knead dough with my hands. Now – it's one of my favourite parts of baking! I just love the soft, smooth, elastic feeling of a good yeast dough ☺️ I'm not joking, I've actually been looking forward to making this recipe since February!!

But enough about my weird obsession with challah.

(It's all thanks to Rachel Talbott and her vlog where she makes challah that sparked this passion off, by the way!)


This vegan challah bread is made without eggs (obviously), but is nonetheless perfectly soft, fluffy, doughy, cloudy, almost cuddly (um, what?), slightly sweet, and basically like a hug from a loved one (anyone feeling lonely and in need of a hug lately?). Plus, it's so pretty!

Let's make this baked bliss that is vegan challah!


  reading time: 10 min


»Do you know Illyrio Mopatis, Magister of Pentos? For my wedding, he gave me three petrified dragon eggs. He believed – the world believed – that the ages had turned them to stone. How many centuries has it been since dragons roamed the skies? But I dreamt that if I carried those eggs into a great fire, they would hatch! When I stepped into the fire, my own people thought I was mad! But when the fire burned out, I was unhurt! The Mother of Dragons! Do you understand? I'm no ordinary woman. My dreams come true.«

– Daenerys, Game of Thrones, season 2, episode 6


Magister Illyrio murmured a command, and four burly slaves hurried forward, bearing between them a great cedar chest bound in bronze. When she opened it, she found piles of the finest velvets and damasks the Free Cities could produce . . . and resting on top, nestled in the soft cloth, three huge eggs. Dany gasped. They were the most beautiful things she had ever seen, each different than the others, patterned in such rich colors that at first she thought they were crusted with jewels, and so large it took both of her hands to hold one. She lifted it delicately, expecting that it would be made of some fine porcelain or delicate enamel, or even blown glass, but it was much heavier than that, as if it were all of solid stone. The surface of the shell was covered with tiny scales, and as she turned the egg between her fingers, they shimmered like polished metal in the light of the setting sun. One egg was a deep green, with burnished bronze flecks that came and went depending on how Dany turned it. Another was pale cream streaked with gold. The last was black, as black as a midnight sea, yet alive with scarlet ripples and swirls. »What are they?« she asked, her voice hushed and full of wonder.

A Game of Thrones, George R. R. Martin


game of thrones daenerys dragon egg
The Mother of Dragons looking fondly at her petrified children. (source)


Daenerys Targaryen, also known as Dany, also known as Daenerys Stormborn of House Targaryen, the First of Her Name, Queen of the Andals and the First Men, Protector of the Seven Kingdoms, the Mother of Dragons, the Khaleesi of the Great Grass Sea, the Unburnt, the Breaker of Chains – yes, that is her full title – has always been my favourite character in the show Game of Thrones, along with Tyrion Lannister. Well, until the last season happened. But let's not get into that.


Instead, let's talk about these gorgeous chocolate dragon eggs!

In A Song of Ice and Fire dragons are said to lay scaled eggs the colour of the dragon within, and are hatched near sources of extreme heat. In Dany's case, she lays the precious three eggs that were given to her by Magister Illyrio Mopatis as a gift for her wedding to Khal Drogo on her husband's funeral pyre. After the pyre is lit, Daenerys walks into the fire, where the eggs hatch into living and fire-breathing dragons.


Amazing artwork of Dany's dragons, Rhaegal, Viserion, and Drogon. (source)


Basically, my take on Dany's dragon eggs are three giant chocolate eggs filled with three different sorts of mousse: a cream-and-gold coloured cream cheese & lemon filling for Viserion, a green-and-bronze coloured matcha & caramel filling for Rhaegal, and a black-and-scarlet raspberry & chocolate filling for Drogon.

My personal favourite is Rhaegal's filling, matcha and caramel (however, you really need to like the taste of matcha for this one!). The three other "taste testers" (my boyfriend and my parents 😜) voted for Viserion's cream cheese & lemon as their number one, with Drogon's chocolate mousse and the matcha as a close second.

The whole idea came about when I spotted Rachel's raw chocolate egg filled with caramel and chocolate mousse a few years ago on Pinterest and was in awe of the sheer size of the chocolate egg. Combine that with my love for veganizing fictional food, and the idea of making giant chocolate dragon eggs was born! (Just like Dany's dragons, lol. Alright, I'll see myself out ...)


DANY'S VEGAN DRAGON EGGS

Preparation time: 2 hours + 1 hour to cool and set
Main ingredients: dark chocolate, vegan cream cheese, coconut butter
difficulty level: moderate-challenging
makes: 3 large chocolate eggs
suitable for: vegan, lactose-free, wheat-free, yeast-free


Ingredients

Chocolate Egg Shells:
300 g
dark vegan chocolate

OR

3 x 120 g store-bought hollow chocolate Easter eggs

Viserion's Filling (cream cheese & lemon):

"cream cheese" cream:
150 g
(2/3 cup) vegan cream cheese
25 g (1/4) cup icing sugar
1/2 tsp vanilla extract

2-3 tbsp vegan lemon curd

Rhaegal's Filling (matcha & caramel):

matcha cream:
75 ml (1/4 cup + 1 tbsp) vegan whipping cream
(I use the German brand Schlagfix for this – place in the refrigerator overnight or in the freezer for about 30 minutes to make it easier to whip!)
1 tbsp icing sugar
1/2 tsp vanilla extract
1 tbsp cream stabilizer
2 tsp matcha powder (see notes below!)
75 g (1/4 cup) vegan quark (I use coconut skyr)

2-3 tbsp vegan caramel sauce

homemade caramel sauce:
250 ml (1 cup) full-fat coconut milk
150 g (2/3 cup) raw cane sugar or brown sugar
150 g (2/3 cup) vegan butter or margarine
1 tbsp maple syrup
1/4 tsp sea salt
1/2 tsp vanilla extract


Drogon's Filling (raspberry & chocolate):

1 cup vegan chocolate mousse, e. g. half the recipe of my vegan chocolate mousse
(which is what I used here; for a more creamy chocolate mousse, I recommend using 1/4 of my silky vegan mousse au chocolat instead!)
(optional) pinch of activated charcoal powder, for darker colour
2-3 tbsp raspberry sauce

raspberry sauce:
120 g (1 cup) fresh or frozen raspberries
2 tbsp sugar
3 tbsp water
1 tsp cornstarch
(optional) 1/2 tsp vanilla extract

also:
1–3 large egg-shaped chocolate molds with a separate top and bottom cavity *


* I got a two-piece plastic egg mould from eBay for about seven bucks that is 10.5 cm high and 7 cm wide at the widest point. Just search for "giant chocolate egg mould" or "dinosaur egg mould" or something similar.


Instructions

To make the egg shells:

Prepare your egg moulds by wiping them clean. They should be as clean and dry as possible. Despite what you may read on the internet, do NOT spray or brush the moulds with oil! It will be a disaster to get the hardened chocolate out of there!!

Gently melt down the chocolate
, using a double boiler (a heat-resistant small bowl on top of a pot filled with 1 inch of boiling water).

Allow the melted chocolate to cool slightly until it starts to thicken.

Using a pastry brush, evenly coat the base of the prepared egg mould cavities – leaving the centre part quite thin as this is where our filling will go. Tap the moulds a few times to allow air bubbles to come to the surface and pop.

Place in the fridge for a few minutes to harden slightly, then add another layer of chocolate, especially around the top edge of the mould. You might even need to paint a third coat to reach the desired thickness. Wipe off any excess chocolate around the edge of each egg.

Pop egg moulds in the fridge or freezer to harden completely.

(Since I only had 1 egg mould to work with, I would coat both halves, leave them to harden completely, then take out the chocolate halves, and repeat the process two more times until I had 6 chocolate egg halves.)


To make the fillings: 

VISERION (cream cheese & lemon):

In a small bowl, beat together vegan cream cheese and icing sugar. Add vanilla essence and mix until smooth. If the mixture is too thick, add a few drops of plant-based milk until smooth. If the mixture is too runny, place it in the fridge for a few minutes to firm up.

As for your lemon curd, make sure it's soft enough to spoon into the egg later. If it's too thick, add a tiny splash of water or non-dairy milk. Store in the fridge until needed.


*

RHAEGAL (matcha & caramel):

For the caramel sauce, place coconut milk, sugar, and vegan butter in a medium saucepan over medium-high heat, stirring continuously until the mixture starts to boil.
Once it boils, reduce the heat to medium-low to simmer for around 30 minutes, stirring occasionally.

Keep simmering and stirring until the caramel sauce is soft and smooth.
Add sea salt and vanilla extract, whisk to combine. Remove the caramel from heat, and let cool down to thicken.

If the caramel sauce turns out too runny, return to the heat for a couple of minutes. If the sauce is too thick, add a tiny splash of non-dairy milk.

In the meantime, use an electric whisk to beat the vegan whipping cream with icing sugar, vanilla extract, matcha powder, and cream stablizier in a medium bowl until stiff peaks form. Fold in the vegan quark until just combined. Pour mixture into an airtight container and refrigerate until set.


*

DROGON (chocolate & raspberry):

In a small saucepan over medium heat, stir together water and cornstarch. Add raspberries and sugar, and stir. Bring to a boil, stirring, then reduce heat and allow to simmer until thickened. Remove the saucepan from the heat, and set aside to cool completely. Add vanilla essence, if desired.

As for your chocolate mousse, store in the fridge until needed. Add a pinch of activated charcoal to the mixture
for a darker colour. (After all, Drogon has black scales!)


To assemble the eggs:

Remove solid egg moulds from the fridge or freezer. Take out only one of the two matching egg halves, carefully pressing on the bottom of the mould to release. If this doesn't work, tap the mould against a clean surface such as a plate or work surface until the chocolate falls out.

For assembling the eggs, you have 2 options:
option 1) filling the eggs before putting together the chocolate shells and cutting off the tops – this is more impressive and makes for a fun surprise, but takes more time and is more difficult to do.
option 2) putting together the chocolate shells and cutting off the tops before filling the eggs – this is the easier way to do it, but also takes away the surprise of the filling. If you are using store-bought hollow chocolate eggs, this is your only option.

Option 1:

For this method,
I recommend placing each egg half back into its mould – that way you won't leave any fingerprints or melt the chocolate with your hands.

Fill each egg halves
with the respective filling, careful not to overfill each half
, otherwise you won't be able to "glue" them together later!
For Viserion: fill each half with 1/2 – 2/3 cream cheese mixture, and 1/3 – 1/2 vegan lemon curd (to resemble egg yolk and also the colour of Viserion's skin).
For Rhaegal: fill each half with 2/3 matcha cream, then drizzle on the caramel sauce.
For Drogon: fill each half with 2/3 chocolate mousse, then
swirl in the raspberry sauce to create "bleeding" red ribbons or veins throughout the mousse.

Using the remaining melted chocolate from making the shells, carefully brush a small amount around the edge of one egg half (I actually used a small spoon for this). Gently place it on top of its matching half to make a whole Dragon egg, careful not to spill the filling, and making sure the two halves line up perfectly.

Press slightly to make sure they are "glued" together. Place in the fridge or freezer to firm up.

Once set, carefully remove filled egg from mould. Use a clean paper towel to wipe off any protruding chocolate from sealing the edges.

Store the filled dragon eggs in the fridge until ready to serve. To serve, carefully
cut the tops off using a non-serrated sharp knife.


Option 2:

Using the remaining melted chocolate from making the shells, carefully brush or spoon a small amount around the edge of one egg half. Carefully place it on top of its matching half to make a whole Dragon egg, making sure they line up perfectly. Press slightly to make sure they are "glued" together.

Place in the fridge or freezer to firm up. Once set, carefully remove hollow egg from mould.
Use a clean paper towel to wipe off any protruding chocolate from sealing the edges.

Repeat with the remaining egg halves.

Once the three eggs are ready (or if using store-bought hollow chocolate eggs), gently cut the tops off using a non-serrated sharp knife.

To fill the eggs, s
poon the filling into the hollow eggs, alternating between different layers:
For Viserion: fill each egg with 2/3s cream cheese mixture, then add 1/3 of vegan lemon curd to the center (to resemble egg yolk and also the colour of Viserion's skin).
For Rhaegal: fill each egg with 2/3s matcha cream, drizzling in the caramel sauce in-between.
For Drogon: fill each egg with 2/3s chocolate mousse, spooning
in the raspberry sauce in-between to create "bleeding" red ribbons or veins throughout the mousse.

Serve!

Serve the dragon eggs immediately (on a bed of hay, preferably in an old wooden trunk 😂), or leave in the refrigerator until ready to serve.

Quick, eat them before they hatch!

Can be refrigerated for up to 3 days.


TIPS & NOTES:
- If you do not like the taste of matcha, omit the matcha powder, and use green food colouring instead. I absolutely love this matcha cream, but I know that the taste of matcha isn't for everyone.
- Use chocolate candy melts to resemble scales! Melt more dark chocolate and adhere scales to eggs by forming overlapping circles of them, starting from the bottom of the egg and going up to the top in overlapping circles, until fully covered.


Looking for more nerdy recipes? Check out some of my other fiction inspired creations:

Sansa's Lemon Cakes (vegan)
http://be-alice.blogspot.com/2017/04/princess-leia-buns-may-4th.html
Princess Leia's Buns (vegan)


♥

Maisy


reading time: 3 min


Granted, I am a bit of a chocoholic. And yes, there are already two recipes for vegan chocolate mousse on my blog, but – they are all very different 😜

While my easy vegan low carb mousse au chocolat from years ago is purely made with coconut milk, my more recent silky vegan mousse au chocolat is made with silken tofu – and today's easy vegan low fat mousse au chocolate has yet another base: aquafaba!

If you don't know about aquafaba yet, it's just the fancy term for chickpea brine. Yes, that weird-smelling liquid that is used to preserve canned chickpeas and that you usually throw away when using the chickpeas! It's actually an amazing plant-based (and basically free) substitute for egg whites, such as in vegan mayonnaise, marshmallows, macarons or even meringue. And don't worry, you won't taste it at all in this recipe, I promise!

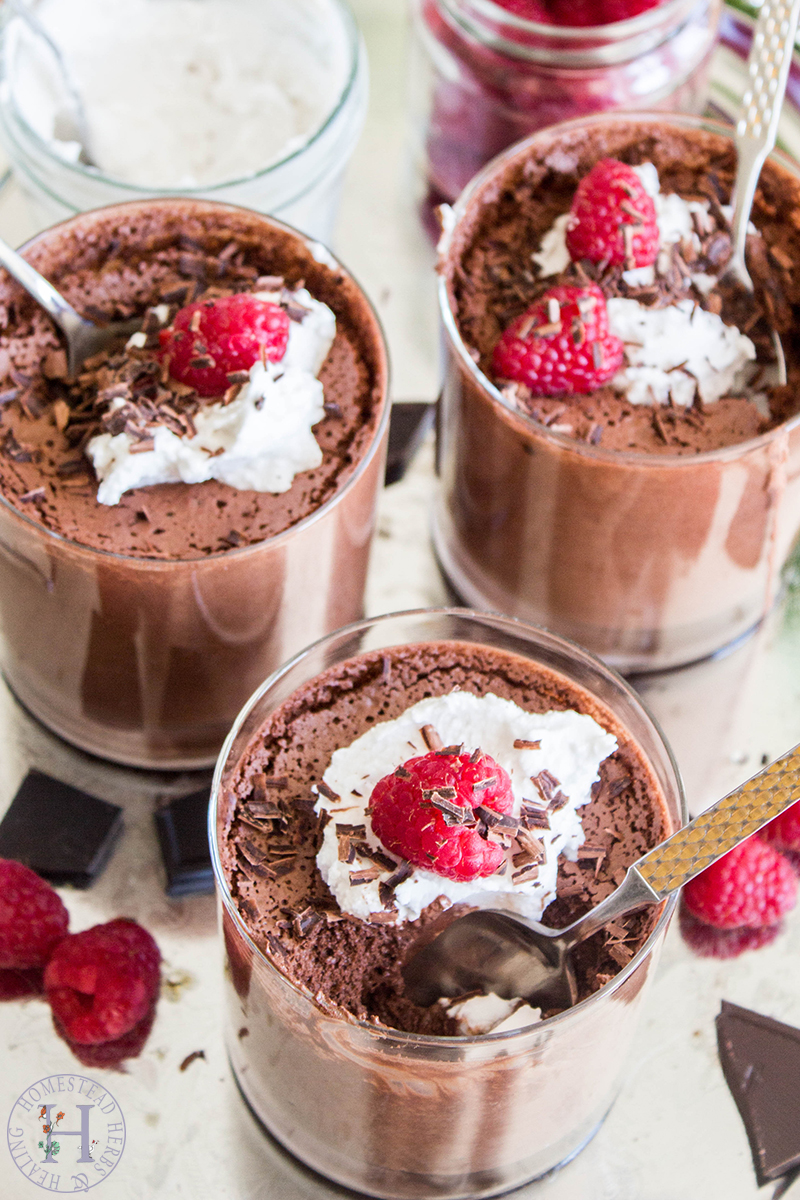
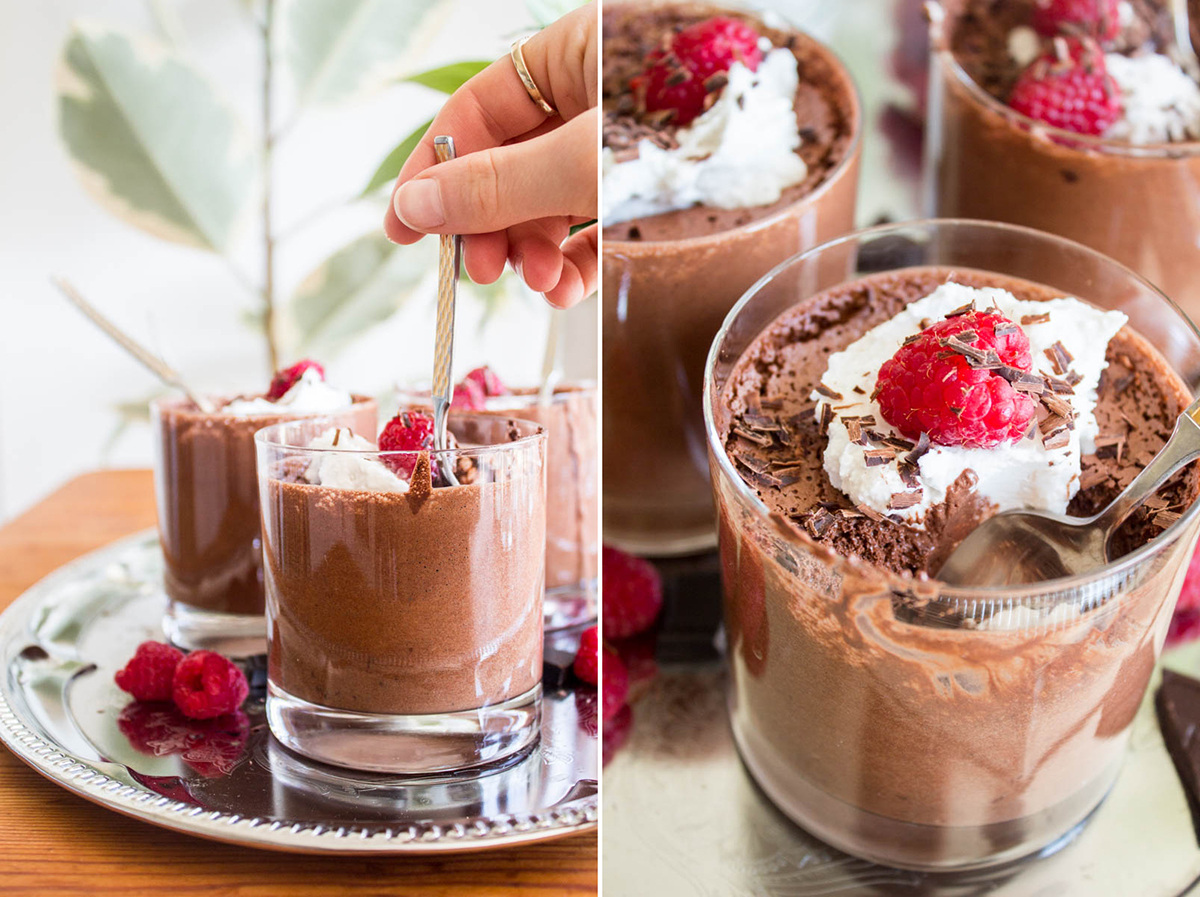
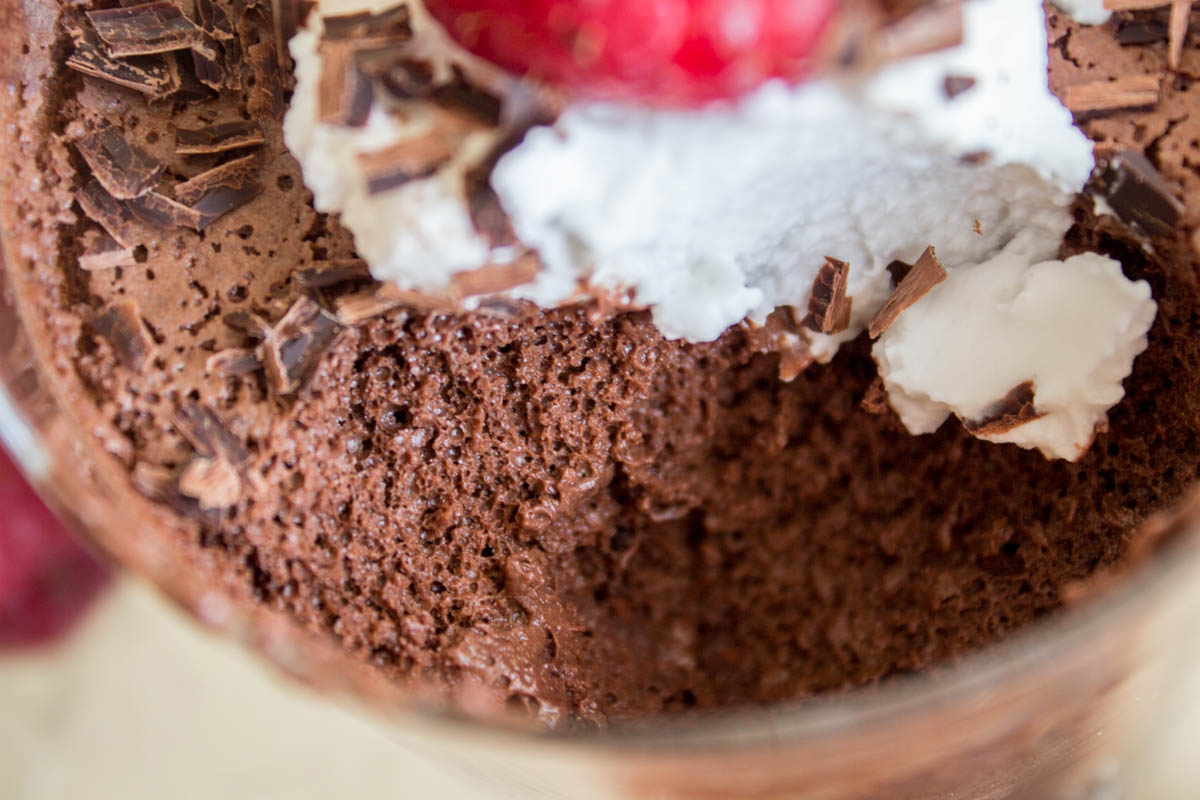
Just look how fluffy, light and airy this chocolate mousse is! And it tastes heavenly chocolaty ... 🥰

Honestly, texture-wise and maybe even taste-wise this has to my favourite of the three mousse recipes. And the best: it uses what is essentially a waste product and turns it into a dreamy dessert!

VEGAN MOUSSE AU CHOCOLAT

Preparation time: 12 mins (+ 1 hour refrigeration)
Main ingredients: chickpea brine, chocolate, non-dairy milk
difficulty level: easy
serves: 2-4
suitable for: vegan, lactose-free, gluten-free, low carb


Ingredients

150 ml (1/2 cup + 2 tbsp) aquafaba (in my case this equaled the liquid / brine of 1 can of chickpeas)
1/2 tsp cream of tartar
125 ml (1/2 cup) non-dairy milk (I recommend almond milk or coconut milk)
1
25 g (1 cup)
high-quality vegan semi-sweet chocolate, roughly chopped (I use 70 %)
2-3 tbsp (1/8 cup) raw cane sugar or light sugar

2-3 tbsp high-quality cacao powder

optional garnish:
shaved vegan semi-sweet chocolate
fresh berries such as raspberries or strawberries
full-fat coconut cream (chilled overnight) or vegan whipped cream


Instructions

Drain the chickpeas and reserve the liquid, aka the aquafaba. (You can use the chickpeas to make falafel burgers, or a yummy coconut curry, or even brownies!)

Place a heat-resistant bowl over boiling water, and combine chopped chocolate, sugar, cacao powder and non-dairy milk in the bowl. Stir occasionally. When the sugar has completely dissolved, and most of the chocolate has melted, turn off the heat and allow to fully melt into a smooth mixture under the residual heat.

Take the bowl off the pot with hot water to allow the mixture to cool down.


Meanwhile, take 150 ml (1/2 cup + 2 tbsp) of aquafaba and add it to a clean glass or metal bowl, along with the cream of tartar. Using an electric whisk, whip whip whip the liquid until you achieve stiff peaks similar to whipped cream, and you can even turn the bowl upside down without the whipped aquafaba moving – this takes about 10 minutes.

Gently fold the melted and cooled down chocolate into the whipped aquafaba mixture with a spatula and very slightly stir it until well incorporated. You will be left with a thick, but still quite liquid foam.

Pour the foamy chocolate mousse into jars and place in the fridge.

Chill for at least 1 hour or until it is needed.


Serve with fresh berries, a bit of grated chocolate, and an optional but recommended dollop of coconut cream of vegan whipped cream on top!


NOTES:
-
It really pays off using a good quality chocolate brand when making your own mousse au chocolat as the recipe's success kind of stands and falls with great rich chocolate.
-  I didn't do this, but apparently it helps to use cold aquafaba to form stiff peaks faster, so you may want to place your canned chickpeas in the fridge for a few hours before beating the aquafaba.
- The cream of tartar works as a stabilizer for the aquafaba here. You could also use cream stablizier instead.


♥

Maisy

  reading time: 15 min


After having undergone my 2 week Ayurvedic at-home cleanse last spring, there was another holistic self care and wellness regimen I wanted to incorporate that year, and that was the 12-week Sacred Woman rites of passage program by Queen Afua designed to empower women, with practical tools for holistic well-being, rooted in ancient African cultural teachings. If you want to know more about the Sacred Woman program, head over to my blog post where I review the corresponding book, Queen Afua's "healing bible", the Sacred Woman: A Guide to Healing the Feminine Body, Mind, and Spirit and explain each Gateway briefly, or check out Queen Afua's website.

The Sacred Woman program is designed for 12 weeks, so roughly 3 months, or about 90 days. Each of the Nine Gateways * takes one week to be completed, with the exception of Gateway 0: The Sacred Woman which should be performed between 3 weeks (which is what I chose) and 4 months. The daily spiritual observances as well as the weekly transformative work tasks vary for each Gateway / week.


* NOTE: In the updated and expanded 20th anniversary edition of the Sacred Woman handbook that was published in 2021 there are twelve Gateways of Initiation instead of ten. The additional Gateways are Gateway 10: Sacred Time (rise at 4 o'clock, "wombnifest" from 11 a.m. to 3 p.m., practice self-care between 4 p.m. and 6 p.m., and recharge throughout the night) and Gateway 11: Sacred Work (live out your purpose, know your vision, your life's mission, spiritualize the service you offer). Please note that I used the "original" publication as reference, not the anniversary edition.


The 3 Month Program

DAILY SCHEDULE
 
Wake Up – Wake up around 4 a.m., and do your Sacred morning routine between 4 a.m. and 6 a.m. when your intuitive energy is the strongest. This is the time of Nebt-Het, the Lady of the House and the Body Temple, the spirit of intuition.

Sacred Bath – Draw a bath using Epsom salt or Dead Sea salts (do not use any salts if you have high blood pressure or oedema!). Your bath should be a spiritual ceremony with lit candles, inspirational music, incense and essential oil.

Altar – Set up your altar as described on pg. 26 in the book. Choose a room or area that is private and undisturbed by the public.

Prayer – Offer a prayer to open the Gateway and invoke each Gateway's spiritual guardian, as provided by the book. If this doesn't resonate with you, I suggest coming up with your own meaningful prayer.

Libation – Pour a small amount of purified water into a bowl and saying the p
rayer on pg. 29 of the book.

Pray and Chant – either using the prayers and chants (hesi) provided by the book, or using your own heartfelt versions.

Fire Breaths – Slowly increasing from 100 to 1000 over time, practice fire breaths as described on pg. 29 of the book. You will add 100 more fire breaths to each Gateway, with the ultimate goal of reaching 1000 fire breaths. Such a powerful practice!

Meditation – Meditate using corresponding healing stones and/or colour visualization exercises as described on pg. 30. The goal is to build up the time we spend in meditation daily, working your way up
each Gateway / week from 5 minutes to 90 minutes.

Herbal Tonics
– Drink an herbal tea, while doing your altar, prayer and journal work, according to the Gateway you are in. I like organic tea from the brand YogiTea.

Flower Essences – Add a flower essence to your water, as described on pg. 31 and pg. 138/139 in the book.

Journal Writing – Write in your journal following your altar work and meditation. You can describe your thoughts and feelings, the day before, what changes you are proud of, who you want to be, you can also write down your goals and aspirations. Use a dedicated Sacred journal for this.

Movement – Move your body by doing the Dance of the Womb presented in Gateway 3 (pg. 95).

Quilt – Add
a piece of cloth to your Senab freedom shawl or quilt, corresponding with the colour of each Gateway.

Affirmation – Close your spiritual morning routine by speaking words to help you on your sacred journey.

 
Dietary Changes / Cleansing Food Plan
 
The suggested diet in the book is based on the ancient basic Khamitic (Egyptian) diet which consisted of beans, lentils, peas, barley, millet, nuts, fruits (such as dates, melons, and pomegranates), vegetables (such as onions, cabbage, and peppers), and healing herbs such as gotu kola, nettle, aloe, garlic, and parsley.

You are instructed to follow the Womb Wellness cleansing food plan on pg. 83. Basically, Queen Afua recommends a vegan diet with a high ratio of raw foods. Meat, eggs, and dairy as well as sugar, table salt and processed grains, canned and frozen foods are considered "dead" oppressive foods. Instead, you should eat lots of vegetables, fruits, sprouts, lentils, beans, peas, nuts in moderation, and soy-based meats in moderation. Abstain from heavier starches such as potatoes or sweet potatoes, or eat them in moderation.

Womb Detoxification & Rejuvenation

  • juice therapy
  • live foods
  • nature's herbs
  • water therapy
  • movement and breath
  • essential oils
  • clay infusions and applications
  • enema
  • oil packs
  • massage 
  • celibacy


I recommend following the 25 Natural-Living Womb Rejuvenation Techniques that are explained in the book on pg. 96–101.


My Experience

WHAT I DID (AND WHAT I DIDN'T DO):


As I've already mentioned in my book review, I was struggling to purchase all of the numerous required tools and ingredients, such as certain flower essences, essential oils, herbs, tonics, crystals, plants, altar objects, and even clothes. As a more minimalism-minded person there were a lot of things that I didn't own (especially clothes in certain colours), and it was also kind of off-putting to purchase and prepare all of this beforehand.

Perhaps, if you were to do this program with a couple of female friends or at least one other woman (as I would recommend!), you could share certain products such as flower essences, essential oils etc. That way it wouldn't be as overwhelming.

What I did end up getting were most of the essential oils (except for white rose and lotus which I couldn't find anywhere), most of the crystals (except for aquamarine, gold carnelian, indigo sapphire, and bloodstone, which weren't available at my local crystal shop), and at least one piece of clothing for each Gateway, which I partially borrowed from my boyfriend and my mum, lol. Instead of the laxative herb cascara sagrada, which I couldn't find anywhere, I took the triphala powder that I had also taken daily for my Ayurvedic cleanse.

What I didn't get
were the flower essences
(because I didn't find them anywhere), most of the herbal tonics (the only teas I got were chamomile tea, and an herbal tea with lemon balm and eucalyptus in it), a pendulum (didn't find one in time), and like I said, some of the herbs, crystals and essential oils.

Some other ways that I didn't stick to the provided program are that I didn't draw a daily bath, mainly because I don't have a bathtub, but I also find it quite consumptive of water to take a bath every day. If I had had a bathtub, I would have taken a bath once a week during the program.

I also didn't get up at 4 a. m. I tried, I really tried! The problem was that I didn't fall asleep earlier than 11 or 12 p. m. (which is my natural rhythm). So after getting up at 4 a.m. for almost a week, and being completely sleep-deprived to the point of feeling dizzy and a little sick all day, I decided to wake up at 6 a. m. instead.

Another thing I didn't do was sew the Senab freedom shawl. It didn't resonate with me, simple as that.

Lastly, like I've also already mentioned in my review, I didn't commit to an increasingly raw vegan diet because I already knew (and it had been confirmed by my Tibetan doctor) that my body doesn't do well on a raw vegan diet. I tried to
avoid sugar, but apart from that I followed my regular vegan diet.

So, I guess you could say that I didn't REALLY truly follow the Sacred Woman program – and you are right!

I adjusted the program to my own life, my needs, and my priorities. After all, I still mostly stuck to the provided program – I did my alter work, anointed my body with the essential oils, I spoke the prayers and chants, I did the Fire Breaths (and yes, I made it to a thousand fire breaths in the end!!), I meditated, I journaled, I did many of the womb cleansing techniques such as internal clay packs, yoni steaming and enemas, I was celibate, I did
almost all of the weekly transformative tasks, I ate a vegan diet, I reduced my sugar intake, I even gave myself a spiritual name in my little initiation ritual which stands for wisdom, beauty and bliss...
 
The fact that I modified/simplified the Sacred Woman program in this way is probably also due to the length of the program. If I am to repeat this journey again over a shorter time period (see final thoughts), it will be easier to stick to the regimen, such as the increasingly raw vegan diet, for a few days instead of weeks. But more on that later.


How the cleanse affected me physically, emotionally & mentally:


Looking back at my Sacred journal, the one new habit that improved my days most noticeably was the fact that I based my daily journaling around a number of questions that I found through Jenn Im and that go like this:

1. my daily affirmation
2. today i want to focus on ...
3. 3 things i'm grateful for
4. 3 traits i love about myself
5. the person i'm becoming
6. i have the opportunity to be my future self today when i ...
7. i am proud of / that ...

After neglecting this habit once the Sacred Woman program was over, I have picked this habit up again last month, and it has once again improved my mood noticeably because it really shifts my perspective when I sit down first thing in the morning while sipping my hot water and think about what my intention for the day is, who I want to be that day – and what I need to do to get there.

Apart from that, the cleanse didn't affect me too drastically, but that might be because I didn't stick strictly to the meal plan and the daily bathing – and perhaps also because I was
already following a plant-based diet for almost ten years now.

I also made it a routine to go for a walk every day for about 1 hour, which is something I had already been doing more or less regularly with my boyfriend.

To be super-duper honest and vulnerable here, the main thing that I had hoped to gain during this program was re-connecting with my feminine sensuality, my libido, my creative passion, and also with my partner. I've talked about this extensively in my blogpost on 12 ways to cultivate & increase your feminine energy, but for a while now I have felt very disconnected from my feminine energy, and I have made it a priority to heal this split, this wound, by using techniques like yoni steaming, or using a yoni egg and yoni oil, or listening to healing music for the sacral chakra – which is associated with sexual energy, intimacy, creativity, passion, emotions, pleasure, and intuition. All things that are also connected to the divine feminine.

I think we women as individuals and a collective still have a lot of personal and universal trauma to work through, or at least that's how I feel. But this is another story.

While the Sacred Woman didn't bring the desired results in this regard (I still felt and feel disconnected from my sexual energy and like my sacral chakra is out of balance), I noticed that while I had cared for my yoni in the ways that I mentioned above, I had completely neglected my womb – as in my inner centre of power and authority – until then. It was such a wonderful freeing and loving experience to follow the guide that Queen Afua provides on pg. 50 and 51 in the book for questions and reflections to contemplate or ask your "womb". Have you ever asked your womb, if "she" feels neglected? If she likes being touched by you or your partner? And if so, where and how? It might sound weird to you now, but give it a try! And I recommend you take the time and write both questions and answers down in order to go deep with this.

Another unexpected way that the program has affected me is that I actually realized that there were still people in my life that I didn't feel comfortable around, and that I wanted to distance myself (which I did as far as I could), and that instead of feeling super passionate etc. after the program, I actually felt the opposite: I didn't want intimacy, I wanted space, I didn't want to be touched, I wanted to be by myself.

And last but not least, I felt strongly that I wanted to have my copper IUD removed that my gynaecologist had renewed one year before (it usually lasts 5 years). I had it taken out in December, and I feel soooo much better now without a weird foreign object inside my womb! If you are wondering what I use for birth control now, I'm back to condoms, and I am also tracking my cycle using FAM, the fertility awareness method. So far, I love it!


THE BEST PART:

Definitely the journaling, as I explained above, including the womb journaling! It has left the most long-lasting impression.

I also really enjoyed the Fire Breaths, which felt powerful and energizing, and were challenging enough to make me feel proud every time I was able to increase the number :)

The most inspiring week was definitely Gateway 4: Sacred Beauty for me, with empowering writings about femininity and reclaiming our natural beauty, as well as the importance of the colours and even shapes we wear. The skin care, the empowering part about embracing and celebrating our natural hair, which is something I have struggled with most of my life, giving myself clay facials, making a Sacred Beauty collage – I just loved it all! Unfortunately, I didn't get to make my own waist beads because I couldn't find any crystal beads such as rose quartz that were small enough and had a hole at the time. But I am still determined to make my waist beads!

Another favourite of mine was Gateway 5: Sacred Space with tasks like purifying and beautifying the home and of course decluttering (I just love decluttering 😍). Along with my boyfriend and my parents, we also had a very special cleansing ritual of our current home, and we even gave it a name: "The Peninsula of Clarification" that is very meaningful both my partner and me.

Just overall getting to spend time with myself and my spiritual / emotional womb was probably the most valuable part of this Sacred Woman program, as well as taking the time to care for my womb physically, using clay packs or doing intuitive sensual womb dances. I feel like I've also become a much more confident dancer overall :)


THE WORST PART:


I've already talked about this, but: getting up at 4 a. m. Honestly, I'm still kind of bummed that this didn't work out for me – but like I said, after a couple of bleary-eyed and dizzy days I prioritized my health over following the program to a T. I am a night-owl after all.
 
Apart from that, there's really nothing unpleasant that I can think of. Although ... I stand corrected. There was one other thing that was quite unpleasant at first, and that is: enemas! Yup, I didn't like the concept of it, and I also didn't like the feeling. But once I had done it a few times, it became less awkward. I mean, after all it's just one of many methods of cleansing your body 🤷🏼‍♀️

What I've adopted into my everyday life:

- Journaling, using the questions to set a daily intention
- Doing yoni steaming occasionally to cleanse my womb, usually a couple of days after my monthly bleeding (The Sacred Woman program also helped me feel much more at peace with my menstruation, by the way!)
- Doing vaginal clay packs occasionally
- Taking enemas (only to prepare for a cleanse)
- Working towards a beautiful and divinely feminine wardrobe that uses much more colours!
- Caring for our sacred home in a loving way
- "Khepheratizing" my words
- Taking on healing as a way of life


FINAL THOUGHTS:

Reflecting on how I implemented the Sacred Woman program into my life, I'd say I did as good as I could at that time – and I applaud myself for that! It's not easy to take time for yourself, for self healing, especially when it requires 3 months of commitment. I don't consider this experience to be a done and complete project, but rather one stage of my journey towards self love and healing.

After having done this modified (simplified) version of the actual Sacred Woman program for three months, I really want to do this program again next year or so, this time over the span of a whole year, so spread across 12 months instead of 12 weeks: January–March: Gateway 0, April: Gateway 1, May: Gateway 2, June: Gateway 3, July: Gateway 4, August: Gateway 5, September: Gateway 6, October: Gateway 7, November: Gateway 8, and December: Gateway 9. The reason for this is that I found one week too little time for some of the Gateway tasks, e. g. my favourite Gateway 4: Sacred Beauty for which I ended up doing a face mask that week as well as an at-home manicure, a scalp and hair treatment, and starting to create a beautiful feminine wardrobe for myself, and I also contemplated my definition of beauty – but I didn't get around to making my own waist beads or creating a Sacred Beauty collage, or taking an air bath, or wearing a sacred shawl, which I really wanted to do.

So I am thinking of doing an entire Sacred Woman year in terms of meditating, journaling, and doing the tasks. I am not going to be celibate for an entire year, and I am also not going to follow the dietary changes (100 % raw in December? In Northern Germany? I don't think so!).

I am also planning to do a third round of the Sacred Woman program (maybe in a few years, or this year), but this time over the course of 12 days instead of weeks, so basically one day per Gateway – with the exception of Gateway 0 which gets 3 days.


If you are looking for a way to cleanse your body, your mind, your relationships, your entire life, and return to a more natural, peaceful, loving way of life – read this book! Do this program! (And if the whole concept seems too daunting, at least do a paired-down version of it, like i did!) I promise, it will get you further along on your personal and spiritual growth journey!

And if you are still hesitant, let me put it this way: If you DON'T participate in coachings and programs like the Sacred Woman program, you will stay in the same place you are now. You will not evolve. You will not grow into the best version of you, your Higher Self.

It's up to you!


Lastly, I want to share something that "came to me" during an evening walk after reading Sacred Woman:

»I AM A HEALER BY NATURE.
WHATEVER WILL HAPPEN IN THE FUTURE,
AND WHATEVER HAPPENED IN THE PAST, 
I CAN AND I WILL HEAL MYSELF.«

🙏🏼


I hope my little "testimonial" here gave you some insight, and perhaps you want to do your own Sacred Woman program some day ... If so, let me know how it goes!


♥

Maisy
 

Newer Posts Older Posts Home

THIS IS ME

Well, hello! My name is Maisy (pronounce: macy) and I’m the creative spirit behind this blog. You are welcome to join me on my journey to a more natural, slow-paced & healthier life!

SUBSCRIBE & FOLLOW

TRENDING THIS MONTH

  • 12 Easy Hairstyles For Shoulder Length Hair | Long Bob
  • Homemade Natural Sunscreen
  • The Inspiration Myth | 8 Ways to Get Creative Instantly
  • DIY Hair Growth Oil
  • DIY Easy Electroculture Plant Antenna

Categories

  • Ayurveda 17
  • beauty 39
  • breakfast 60
  • dessert 180
  • diy 53
  • fermenting 9
  • fictional food 21
  • foraging 30
  • gardening 11
  • gluten-free 98
  • healing 72
  • herbs 28
  • homestead 122
  • main course 30
  • minimalism 39
  • snack 92
  • sugar-free 91
  • zero waste 49
Powered by Blogger.

Archive

  • ▼  2026 (8)
    • ▼  September (1)
      • Easy Homemade Fire Cider with herbs
    • ►  June (1)
    • ►  May (1)
    • ►  April (2)
    • ►  March (2)
    • ►  February (1)
  • ►  2024 (3)
    • ►  September (1)
    • ►  March (1)
    • ►  January (1)
  • ►  2023 (22)
    • ►  December (2)
    • ►  November (2)
    • ►  August (1)
    • ►  July (1)
    • ►  June (1)
    • ►  May (3)
    • ►  April (3)
    • ►  March (3)
    • ►  February (3)
    • ►  January (3)
  • ►  2022 (65)
    • ►  December (5)
    • ►  November (3)
    • ►  October (5)
    • ►  September (5)
    • ►  August (6)
    • ►  July (6)
    • ►  June (4)
    • ►  May (6)
    • ►  April (5)
    • ►  March (7)
    • ►  February (7)
    • ►  January (6)
  • ►  2021 (58)
    • ►  December (5)
    • ►  November (6)
    • ►  October (6)
    • ►  September (8)
    • ►  August (6)
    • ►  July (7)
    • ►  June (5)
    • ►  May (4)
    • ►  April (4)
    • ►  March (3)
    • ►  February (3)
    • ►  January (1)
  • ►  2020 (20)
    • ►  December (1)
    • ►  July (1)
    • ►  June (4)
    • ►  May (6)
    • ►  April (1)
    • ►  March (2)
    • ►  February (4)
    • ►  January (1)
  • ►  2019 (19)
    • ►  December (2)
    • ►  October (4)
    • ►  September (2)
    • ►  August (3)
    • ►  June (2)
    • ►  April (2)
    • ►  March (1)
    • ►  February (1)
    • ►  January (2)
  • ►  2018 (68)
    • ►  December (1)
    • ►  November (2)
    • ►  October (1)
    • ►  September (4)
    • ►  August (2)
    • ►  July (10)
    • ►  June (4)
    • ►  May (5)
    • ►  April (8)
    • ►  March (12)
    • ►  February (8)
    • ►  January (11)
  • ►  2017 (153)
    • ►  December (13)
    • ►  November (10)
    • ►  October (35)
    • ►  September (13)
    • ►  August (11)
    • ►  July (9)
    • ►  June (1)
    • ►  May (12)
    • ►  April (13)
    • ►  March (16)
    • ►  February (11)
    • ►  January (9)
  • ►  2016 (90)
    • ►  December (9)
    • ►  November (13)
    • ►  October (8)
    • ►  September (12)
    • ►  August (9)
    • ►  July (12)
    • ►  June (7)
    • ►  May (6)
    • ►  April (5)
    • ►  March (2)
    • ►  February (4)
    • ►  January (3)
  • ►  2015 (54)
    • ►  December (4)
    • ►  November (1)
    • ►  October (1)
    • ►  September (4)
    • ►  August (1)
    • ►  July (22)
    • ►  June (4)
    • ►  May (5)
    • ►  April (3)
    • ►  March (6)
    • ►  February (3)
  • ►  2014 (27)
    • ►  December (2)
    • ►  October (2)
    • ►  August (1)
    • ►  July (5)
    • ►  June (3)
    • ►  May (3)
    • ►  April (6)
    • ►  March (2)
    • ►  February (3)
  • ►  2013 (7)
    • ►  December (2)
    • ►  October (1)
    • ►  September (3)
    • ►  June (1)

SEARCH THIS BLOG


total page views

Most Popular Posts

  • DIY Easy Electroculture Plant Antenna
  • 12 Easy Hairstyles For Shoulder Length Hair | Long Bob
  • DIY Hair Growth Oil

Privacy Policy


Copyright © Homestead Herbs & Healing | holistic living. Designed by OddThemes