reading time: 6 min
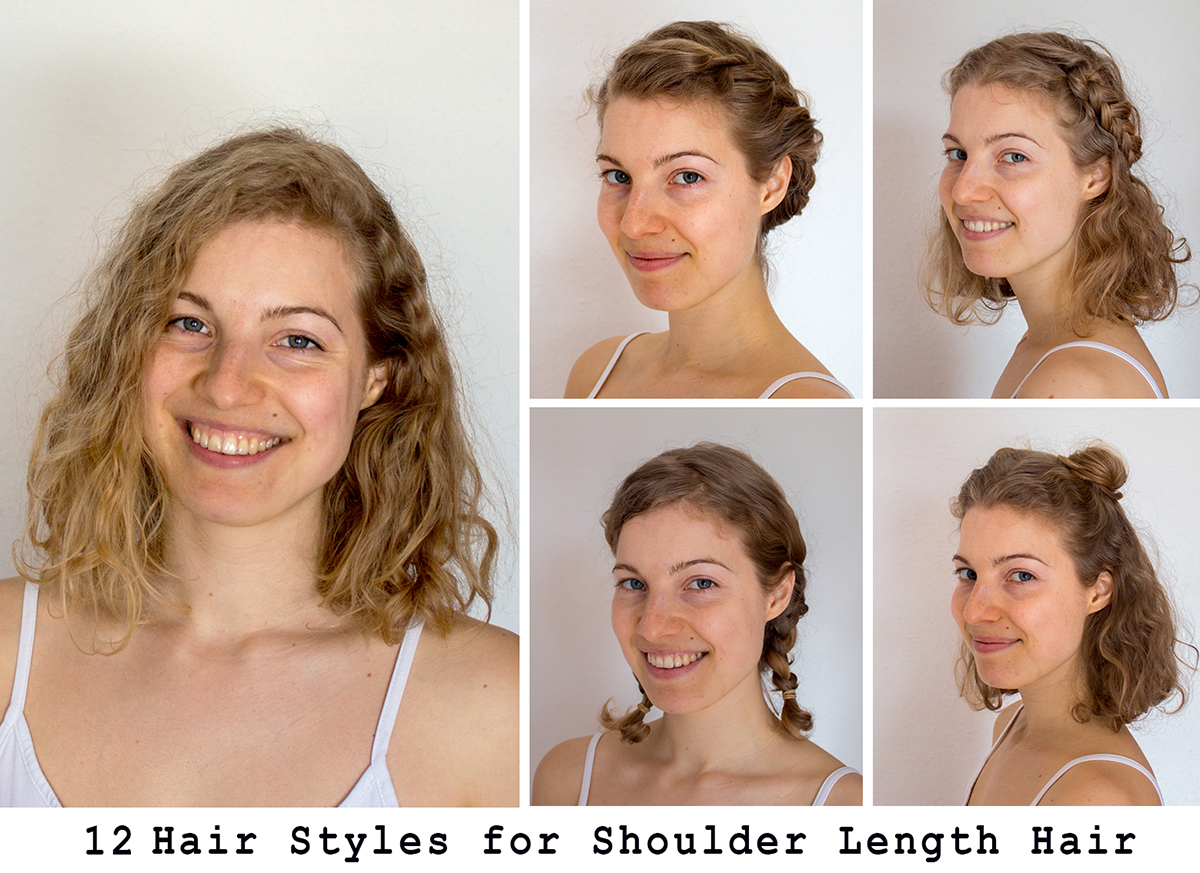
It's been 9 and a half months now since I chopped off and donated 30 centimeters / 12 inches of my hair. Prior to this "turning point" I had done a blog post on 10 hair styles for long hair, and afterwards I did one on 8 hair styles for short hair. Now that my hair has grown quite a bit (from chin length to shoulder length) and is at an awkward in-between stage of "not very short but also quite long yet", it is time to show you my adjusted hair styling: not eight, not ten, but 12 hair styles for mid-length hair that work on both straight and curly hair!
A little disclaimer: As much as I enjoy playing around with my hair, I'm definitely not someone who is "good at hair", and I usually end up wearing the same three hassle-free hairstyles over and over again. That being said, I'm confident that if I can tackle these hairstyles, I know that you can too!
The only "tools" you will need are no more than three elastics and a handful of bobby pins. Let's get started!
EASY MID LENGTH HAIRSTYLES

(1) The Twist Back
This twisty hairstyle looks unique and chic, but it really takes no time to do. Create
a middle parting. Then take the two strands of hair right next to your parting and pull them back into a tiny ponytail. The ponytail should start in the middle
section at the back of your head. Use a clear elastic to secure. Flip up your little ponytail and wrap it around the elastic. Pull the entire length through so that it falls straight down. There you have your first topsy tail twist!
Now gather a second layer of hair by taking two sections of hair right underneath the first two strands. Pull these sections of hair to the back of your head, and group them with the small ponytail from the first layer. Use another clear elastic band to secure these three sections together into a new, larger section of hair. Repeat the topsy tail twist by creating a gap between the first and the second elastic, flip up and pull through your ponytail. Et voilà!
(2) The Braided Headband
Putting my bangs in a braid and pinning them back or incorporating them into a ponytail has always been a favourite of mine. For this hairstyle, part your hair in the middle. Take some hair from one side of your fringe section, divide it into three strand and put them into a regular three-strand braid. The key here is to always cross your outside strands under the middle one. That way you will create a Dutch braid-esque effect.
(Of course you could also do an actual Dutch braid by adding more hair to the braid as you go along, but I like to keep it simple. This would also look great with a waterfall braid technique!)
(Of course you could also do an actual Dutch braid by adding more hair to the braid as you go along, but I like to keep it simple. This would also look great with a waterfall braid technique!)
Once you've braided your braid, secure the ends with a hair tie, and repeat on the other side. Grab
both braids and tie them together at the back of your head with a clear
elastic or secure them with bobby pins to create a "crown" effect. I like to go back and loosen up the braids as much as possible by pulling them apart for
that slightly bohemian look. Pull out a few tendrils to frame your face, and you're
done!

(3) The Low Bun
If your hair is still a little too short to put into a proper ponytail without having to use a dozen of bobby pins to keep those loose little neck hairs in place, this hairstyle is a great and neat looking alternative. Start by neatly combing your hair. From there, create a clean center part using your comb. Using the comb or brush, bring your hair into a low ponytail at the nape of your neck. Secure with a hair tie. Ta-da! A sleek low bun.

(4) The Back Braid
For this slightly elvish inspired hair, once again section off some hair from each side of your fringe section, as well as one strand from the back of your head, and braid them into a loose three-strand braid. Finish off with a hair tie, and that's it! Easy-peasy.
This hairstyle looks even better and more elvish with a fishtail braid if you are capable of doing that (me: not so much, lol).

(5) The Half Up Half Down
This is probably my most-worn hairstyle lately and super low-maintenance. All you do to achieve this effortless look is to section off the top half of your hair, and bring it to the back of your head. Tie into a ponytail, gently pull the hair above the hair tie to create more volume, and you're good to go.

(6) The Tiny Pigtails
Now this playful, sort of childish hairstyle is nothing I would wear to the office, but it's a cute one for a festival or other fun activities, especially when paired with a hat. Part your hair down the middle (actually, I like to do a little bit of a side part because otherwise I end up looking like a four year old, lol). Start with one side.
Starting from the base of your ear divide your hair into three sections and put it into a classic three-strand braid. Secure with a hair tie. Repeat on the other side. You could jazz this up by doing a full on French braid from the top of your head to the tip of your hair!
Starting from the base of your ear divide your hair into three sections and put it into a classic three-strand braid. Secure with a hair tie. Repeat on the other side. You could jazz this up by doing a full on French braid from the top of your head to the tip of your hair!

(7) The Half Up Top Knot
This carefree, casual spin on a full high bun is another favourite of mine that you'll see me wearing every other day – the typical blogger hairstyle along with the messy bun, I know!
Unlike the man bun that I share over here, this one is done by dividing the top section of your hair (I like to start at my temples, but your could also start right above your ears) and pulling it back into a ponytail. Do your best to create a
straight line between the hair you will put in the top knot and the hair that will stay down. Now twist your ponytail in one direction, so that the hair will coil itself into a ball/bun. Don't twist too tight because you want to leave some volume and texture. Wrap around a clear elastic and fix up the shape of your knot.
I like to gently tuck in all directions and loosen it up to create a round, voluminous bun. Secure with two to three bobby pins once you like the shape of it. Lastly, carefully pull at the roots from your front hair to create more volume and balance out the volume of the bun. Done!

(8) The Half Up Twist aka The Twisted Crown
For this soft, romantic hairstyle, do a center part or a side part. Starting on one side, take a strand of hair near your parting and divide it into two sections. Cross the bottom section over the upper section and add a new section of hair from the top. Continue twisting your hair like this, adding hair from the top as you go. Once you reach the back of your head, stop adding in new sections of hair and just twist the two sections around each other until you reach the end. Tie it off with a clear elastic or just use bobby pins to secure. Repeat on the other side. Twist both ends around each other – or tie them like a simple knot – to hide any elastics and create the illusion of a continuous crown. Secure with bobby pins.
Alternatively you could do this hairstyle with a waterfall braid!

(9) The Chibi Buns
As cute as this hairstyle looks, it actually took me longest out of all of them! All you do is part the top layer of your hair down the middle and separate into two sections. Create two pigtails to make sure your buns will end up being even (this is what took me so long!). Then wrap the hair around the base of the pigtail to form little buns. Secure with hair ties and bobby pins.

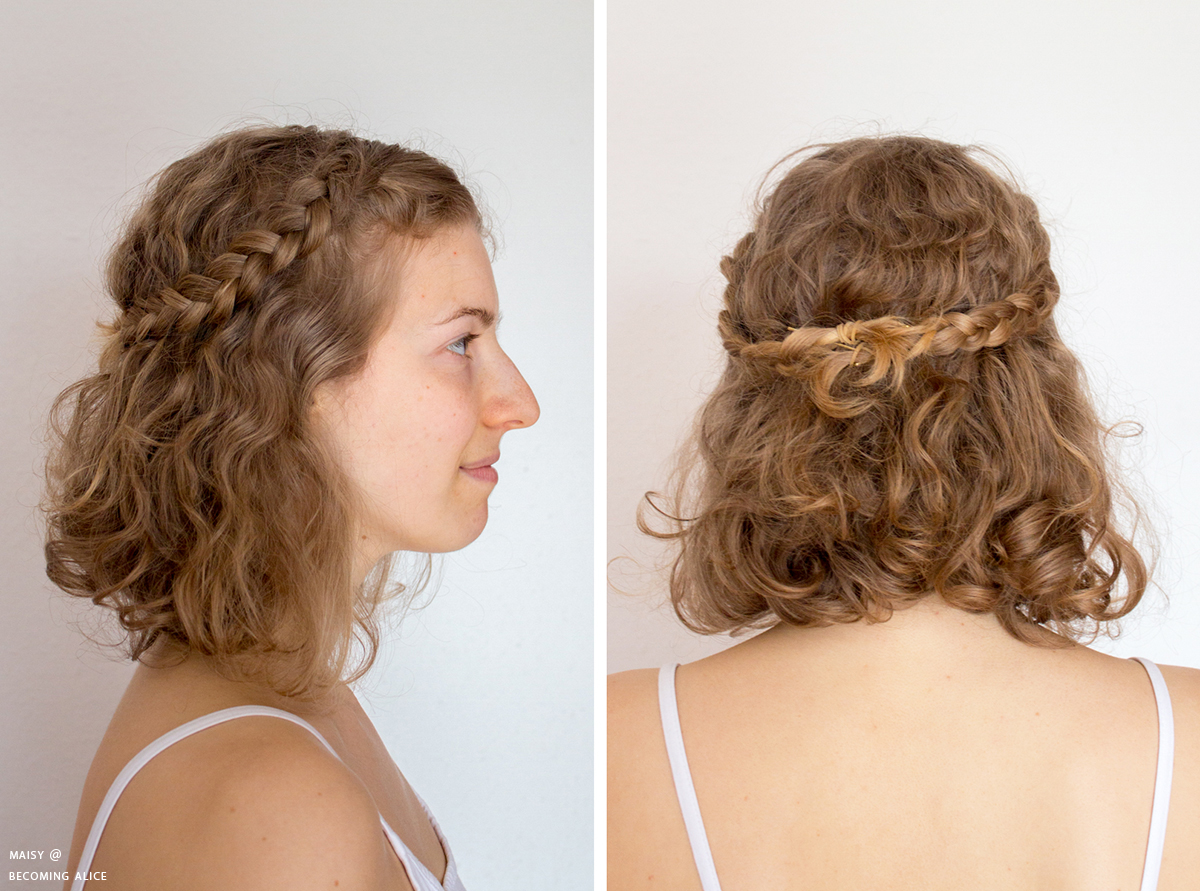
(10) The French Side Twist
This hairstyle is a new favourite of mine because it looks cool, but only takes minutes to do. Start
by taking a section of hair on top of your head, right at your parting (I prefer a deep side part for this).
Separate it into two strands. Cross
the strand at the front over the other, then pick a small
section of hair from the bottom and add it to the front strand.
Continue French twisting your hair away from your face, always adding another
strand from the bottom, crossing it over and so on and so forth. Follow
your hairline until you reach the base of your ear, and secure the twist
with a hair elastic and/or bobby pins.


(11) The French Side Twist Updo
(11) The French Side Twist Updo
You can also turn the French side twist from before into a whimsical girl-in-a-wildflower-field braided updo. In order to do that, take out your elastic from before and French twist the rest of your hair strand until you reach the back of your head. Secure with an elastic. Repeat
the French twist on the other side and secure with another elastic. Now wrap the two twisted ropes around each other to cover your elastics (since I didn't use a transparent one, you can still see mine) and pin the ends up at
nape of your neck, trying to conceal your bobby pins.


(12) The Triple Twist
This last hairstyle is a variation of the very first one, taking the double twist to the next level: the triple twist. I love this one because it's a little more messy and sassy than the former. Just like in hairstyle Nr (1) start by separating
the top section of your hair. This time gather it at the very top of your head (like a little pineapple ponytail) and secure with a clear elastic. Next use your fingers to gently divide your hair above the elastic to create a small gap. Flip the tail of your pony onto itself and loop it into the gap. Once you've done that, pull it all the way through
to form your first twist.
Now you need to section another layer of hair from just underneath your first section. Gather these two strands into
another tiny ponytail, combine them with your first topsy tail piece to form a new, thicker ponytail. Secure with a clear elastic. Create
the second twist as before: Make a gap between the first and the second elastic, then flip the tail and loop it into the hole, to form
your second twist.
Lastly, section off the third layer of hair, meaning the two
strands of hair from underneath your last layer. Pull them back into another
ponytail, grouping that with the tail from the last layer, and once again loop everything through to form the third and last twist. Finish
by loosening and arranging each layer: At each gathering point, pull
and separate each chunk of hair to create volume. There you have it!
Which hairstyle is your favourite?
And which are your personal go-to styles for shoulder length hair?
♥
Maisy


1 Comments
O how lovely. I love those styles. Tiny pigtails ar so sweet...
ReplyDelete