Homestead Herbs & Healing | holistic living
  • Start Here
  • Homestead
  • Herbs
  • Healing
  • Recipes
    • Breakfast
    • Main Course
    • Dessert
    • Snack
  • DIY
  • Minimalism
  • About Me

  reading time: 4 min


 »I think I know who that one's from,« said Ron, turning a bit pink and pointing to a very lumpy parcel. »My mom. I told her you didn't expect any presents and – oh, no,« he groaned, »she's made you a Weasley sweater.«
Harry had torn open the parcel to find a thick, hand-knitted sweater in emerald green and a large box of homemade fudge.
»Every year she makes us a sweater,« said Ron, unwrapping his own, »and mine’s always maroon.«
»That’s really nice of her,« said Harry, trying the fudge, which was very tasty.

    Harry Potter and the Philosopher’s Stone, J. K. Rowling


MERRY CHRISTMAS EVERYBODY!

I am aware that British fudge is usually a softer and very caramel-y dessert, however to celebrate the Christmas season, I thought it was more fitting to make a chocolate-flavoured version – that also makes an excellent edible holiday gift for any sweet tooth in your family, friend group or neighbourhood! This year I actually made a big batch of different kinds of vegan Christmas cookies and dropped by my friends' house to surprise them with an edible gift since don't see each other on Christmas.

By the way, who is watching the entire Harry Potter movie series this Christmas season? I usually alternate between watching the Lord of the Rings movies, the Hobbit movies, the Star Wars movies, and Harry Potter – and this year it's Harry Potter 😁 Next up is Order of the Phoenix. (As I am typing this, I am actually listening to the Harry Potter Music & Ambience | Hogsmead which is lovely!)

Anyway.

I think there is something very "Christmas" about the mismatched and colourful, cosy and caring energy of the Weasley family. One of my favourite festive scenes in Harry Potter and the Philosopher's Stone is the one where Harry wakes up on Christmas morning and finds the Gryffindor common room filled with a cosy crackling fireplace, squashy crimson armchairs, a Christmas tree, and Ron waiting for him in his maroon sweater with the initial "R" that his mum knitted for him. Together, they open their Christmas presents – it's the first time that Harry gets any presents at all, and among other things he receives a box of homemade fudge from Mrs. Weasley.


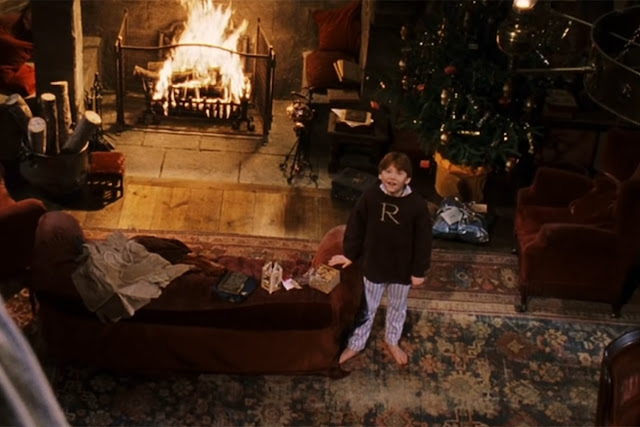
Ron is ready to stuff his face with fudge and play a game of Wizard's Chess.


This recipe was inspired by Harry Potter: Mrs. Weasley's Fudge from Feast of Starlight who make the most beautiful fictional recipes! However, their recipes aren't vegan, and so I based my recipe on the vegan chocolate fudge from Loving It Vegan.

This was actually my first time making fudge, and vegan fudge at that, so don't come at me if this doesn't taste like your grandma's fudge, alright? It tastes like Mrs. Weasley's fudge :)


Mrs. Weasley is proud of me. (source)

And yes, I couldn't resist making / improvising my own Weasley jumper by crafting the letter M out of green felt and securing it on my most Weasley-esque sweater using safety pins, lol.

  reading time: 17 min


Have you ever listened to the English Christmas carol The Twelve Days of Christmas and wondered what they are singing about? The Twelve Days of Christmas are also known as Twelvetide, The Omen Days, The Twelve Quiet Days or The Twelve Holy Nights, and they refer to the special period of time between the old year and the new year.

These twelve nights arise because on the one hand there is the solar calendar with 365 days, and on the other hand there are the twelve moons with 354 days, 29.5 days per month. This results in a difference of twelve nights – twelve days that are neither part of the old year nor part of the new year and therefore "outside" of time. It is believed to be a period during which time "stands still" when the veil between the worlds is thin, and therefore it is a highly spiritual time.

Officially, the Twelve Days of Christmas begin on the night of Christmas Eve or Christmas Day, December 25, and conclude on Epiphany, January 5, at midnight which is also known as Three Kings Day or Twelfth Day.

Alternatively and going
by the name of Yuletide or the Twelve Days of Yule you can also celebrate this mystical time beginning on Yule which falls on December 21, and ending on January 1. This is also where the custom of burning a Yule log for the duration of 12 days comes into play.

In my case, I usually celebrate the Twelve Days starting on Christmas Day, but
this decision is entirely up to you.

During the Twelve Days it is believed that the Wild Hunt begins and Odin roams the skies with his army of the dead to frighten man and beast. At this time, people should stay indoors in order not to be carried away by the raging Wild Hunt. But people also thought of the departed souls and prayed for them so that they would be freed.

For that reason it was and still is common to put candles on the window sill or by the door and to smudge the home to protect yourself from unwelcome spirits that pass by. We are also particularly close to our ancestors during this time and we can honour them through thoughts and prayers. This time is also particularly good for making wishes and oracles.

In fact, the Twelve Days are even said to predict the course of the new year.
Basically, each of the twelve days is said to correlate to how each month of the next year will be, so December 25 represents what January will hold for your, December 26 represents February and so on.

It is a time of peace and silence, of introspective and reflection. All work should be left undone, if possible. So it's best to take the days off during this period, and spend the time at home, recalling the old year, thinking of your resolutions for the coming near, or just reading a good book!

Today I want to share with you the daily rituals that you can do during the magical time of Twelvetide or The Twelve Days of Christmas. These rituals are separated into general rituals you can do every day, and rituals that are specific to each day of the Twelve Days.


  reading time: 3 min


I LOVE a good, fresh out of the oven yeast dough. In other words, I love me some sweet and carby goodness :)
 
This braided challah-esque bread is particularly soft, doughy, buttery, and best consumed when still warm. While more traditionally consumed around Easter, this recipe works great for any other holidays such as Christmas or Hanukkah, or just your regular Sunday brunch. So if you are looking for a great recipe for a chill Christmas morning with the family, look no further than this lovely sweet yeast braid.

I recommend making the dough the night before, and then
braiding and baking it in the morning to eat fresh and warm for breakfast. Serve with jam or some vegan butter, nut butter, or by itself.


reading time: 5 min


Black Forest Cake (Schwarzwälder Kirschtorte) is a traditional German dessert, probably named after the Black Forest in southwestern Germany, or rather the local speciality of Schwarzwälder Kirsch(wasser), a brandy made from sour cherries.

It is the most popular cake here in Germany, traditionally made with chocolate sponge cake layers filled with whipped cream and cherry compote as well as covered in whipped cream and chocolate shavings, resulting in a slightly rustic look. It usually also contains Kirsch or Kirschwasser, hence the name. I made this gorgeous cake – that would also be absolutely justified to bear the name "Snow White Cake" in my opinion – for my fiancé's birthday this week. It was a huge hit!!

In our case, I made it alcohol-free, but I did include some instructions for adding the cherry brandy in the recipe, if you prefer your cake to be a bit boozy. I also didn't go for the classic chocolate shavings on the sides, but used homemade chocolate bark instead. Again, instructions for that are included in this recipe!

This Black Forest cake is
egg-free
dairy-free
wheat-free
rich
moist
fluffy
light
soft
chocolatey
fruity
& simply heavenly

I've created my own recipe based on various recipes online, most notably this one by Bianca Zapatka, as well as this one.

This recipe is ideal to prepare over two days – prepare the cake and the cherry compote the night before, and continue with the cream filling and frosting the next day. The finished cake can be chilled for a couple of hours before serving!


VEGAN BLACK FOREST CAKE

Preparation time: 2 hours
Main ingredients: spelt flour, sugar, cacao, cream, cherries
difficulty level: easy-moderate
serves: 12 (26 cm- or 10-inch springform pan)
suitable for: vegan, lactose-free, wheat-free, yeast-free, nut-free

Ingredients

Chocolate cake:
450 g spelt flour (type 630)
300 g
raw cane sugar 
1 packet (15 g) of baking powder
2 tbsp cornstarch

1/2 tsp salt (I recommend using kala namak for that "eggy" taste, but regular salt is also just fine!)
5 tbsp cacao powder

12 tbsp sunflower oil or canola oil
500 ml water or plant-based milk (I use filtered water)
(optional but recommended)
2–3 tbsp chopped vegan dark chocolate or vegan dark chocolate shavings
(optional) up to 9 tbsp Kirschwasser (or other cherry brandy or rum)


Cherry compote:
350 g cherries, canned or fresh (I use canned morello cherries)
230 ml cherry juice (from the canned cherries)
40 g raw cane sugar
3 tbsp cornstarch
(optional) 1
tsp vanilla extract

Cream filling and frosting:

500 ml vegan whipping cream (I use the German brand Schlagfix for this – place in the refrigerator overnight or in the freezer for about 30 minutes to make it easier to whip!)
2 1/2 packets of cream stabilizer
3 drops of vanilla flavouring

Chocolate bark:
200 g good quality dark vegan chocolate, chopped

Garnish:
8–16 fresh or canned cherries (maraschino cherries are traditional, but I use the canned morello cherries)
3–4 tbsp dark
vegan chocolate shavings

Instructions

I recommend preparing the chocolate cake either the day before assembling the cake, or at least a couple hours prior to serving.

To make the chocolate cake:

Preheat oven to 170 °C / 340 °F. Grease and flour a 26 cm- or 10-inch springform pan.

In a large mixing bowl combine spelt flour, sugar, baking powder, cornstarch, cacao powder, and salt. Add vegetable oil, and water or plant-based milk. Whisk well until the batter is nicely incorporated. Gently fold in chopped dark chocolate, if using.

Transfer the batter to the prepared springform pan, and bake in the preheated oven at 170 °C / 340 °F for 45 minutes, or until a skewer comes out clean.

Remove the cake from the oven, and leave to cool in the pan for 10 minutes before removing the sides of the springform pan. Leave to cool completely on a wire rack.

TIP: While the cake is baking (or while it is cooling down) you can already go ahead and make the cherry compote!

To make the cherry compote: 

If using canned cherries, drain the cherries, and collect the juice. Reserve 230 ml of the cherry juice, and discard (aka: drink) the rest.

Combine 3 tbsp of the reserved cherry juice in a small bowl with the cornstarch. Whisk until dissolved, the add the sugar.

Bring the remaining cherry juice in a small saucepan to a simmer, remove from the heat and whisk in the cornstarch/sugar mixture. Bring back to a simmer while whisking constantly until it starts to thicken. Add the cherries, and cook for another 3 minutes or so until thickened a little more. Stir in the optional vanilla essence, if using, and remove from heat. Set aside to cool.


To make the chocolate bark:

Melt dark chocolate using the double boiler method or in the microwave, stirring in between until fully melted. Pour the melted chocolate onto a piece of parchment paper. Using a spatula, spread the chocolate to a thin even layer.

Roll up the parchment from the short side, making sure that only paper touches the chocolate, no chocolate to chocolate. Once it is no longer hot, refrigerate or freeze until firm.

To use, slowly unroll the paper with the chocolate facing upwards toward you. The shards will start to break on their own.


To make the cream filling and frosting:


Remove the vegan whipping cream from the fridge or freezer. Beat cream using an electric hand mixer on high speed for about 1 minute. Add cream stabilizer and continue whipping until stiff peaks form.

TIP: Ideally use an ideally cold bowl for this, that you have also placed in the refrigerator for a while.


Refrigerate until ready to use.


To assemble:

Using a serrated knife, level the completely cooled cake by trimming of the top. (Feed that to your loved ones that are already waiting for you to finish the cake ☺️) Cut the trimmed cake horizontally into three layers. Place the bottom layer on a serving plate or cake stand. If you like, drizzle all three cake layers with up to 3 tbsp Kirschwasser each.

Spread half of the cherry compote evenly on the bottom cake layer. Spread about a third of the whipped cream over the compote, leaving about a finger's width around the edge. (It will squash out a little when you sandwich the layers together.) Make sure that the surface is as smooth and even as possible.

Top with the middle cake layer and repeat spreading with the remaining cherry compote and another third cream.

Lastly, carefully place the third cake layer on top (smooth side up). Set aside about 3/4 cup of whipped cream for decoration.

Using a clean spatula, frost the top and sides of the cake with the remaining whipped cream until the cake is completely covered in whipped cream.

Decorate sides of the cake with the prepared chocolate bark. Pipe 8 to 16 swirls of whipped cream around the edge of the cake, and garnish the middle of the cake with remaining chopped chocolate bark or chocolate shavings. Put a cherry on each cream swirl.

Refrigerate cake until serving. Dig in!


If you are looking for more veganized German classics, you might like these:

Vegan Snow White Cake | Donauwelle
Vegan Butter Cake | Butterkuchen
Vegan German Bee Sting Cake | Bienenstich
Vegan Mole Cake | Maulwurfskuchen


♥

Maisy


 reading time: 4 min


In summer 2018 I chopped off 30 centimetres / 12 inches of my hair because I needed a fresh start, and also because I really wanted to donate my hair to a charity. From this day onward I stopped straightening my hair because the health of my hair (and my overall body) became a priority.

In February 2020 – just before the whole world started to fall apart and renew itself – I got engaged! And since
I want to have long, strong and shiny hair to put into a beautiful bridal hairstyle for my soon-to-come wedding, I have been growing out my hair for the past 1 1/2 years. One of the things I did to speed up hair growth and keep my hair looking supple and healthy is to apply this homemade hair oil onto my scalp and to the tips of my hair once a week.

Using high-quality oils is key here, as these will provide the necessary vital elements such fatty acids for fast growing, healthy hair. Oils are also great for detangling hair (kind of like a hair lubricant), and they also work as a (heat) protectant that seals the cuticle down. You could skip the rosemary and stick to pure oils, but I wouldn't recommend that since rosemary is known to be one of the most potent herbs to strengthen circulation, stimulate hair growth, thicken hair, prevent premature greying and dandruff.

I find that natural treatments always work the best (and they don't have any nasty side effects like many commercial chemical based products). This oil has amazing hair benefits like boosting hair growth, fighting dandruff, adding lustre, strengthening hair follicles etc. It's also great for repairing dry, frizzy and damaged hair.

I hope this homemade hair oil also helps you to get long and strong hair in a completely natural way!


reading time: 4 min


»Indeed it is,« said Gimli. »Why it is better than the honey-cakes of the Beornings, and that is great praise, for the Beornings are the best bakers that I know of; but they are none too willing to deal out their cakes to travellers in these days.«

The Fellowship of the Ring, J.R.R. Tolkien


(...) he would lade them with food to last them for weeks with care, and packed so as to be as easy as possible to carry-nuts, flour, sealed jars of dried fruits, and red earthenware pots of honey, and twice-baked cakes that would keep good a long time, and on a little of which they could march far. The making of these was one of his secrets; but honey was in them, as in most of his foods, and they were good to eat, though they made one thirsty…

The Hobbit, J.R.R. Tolkien


Today we are making honey cakes that would make Beorn proud! Well, actually I made these brownie-like cakes a looong time ago for my friend Björn's birthday because the name Björn (like Bjorn from Vikings) sounds very similar to Beorn and also means "bear" in Swedish, but didn't get around to posting them until now.

For those who aren’t familiar with The Hobbit, Beorn is a shape-shifter (J.R.R. Tolkien called it a “skin-changer” in the book) who helps Bilbo and the 13 dwarves on their quest to the Lonely Mountain. He’s a vegetarian, but can take on the form of a huge bear, who is very fond of honey and cream. Honey cakes were the speciality of the Beornings, the people living between Mirkwood and the Misty Mountains. You can find an illustration by Tolkien of Beorn's hall down below :)

Fun fact: The character of Beorn is probably based on the hero Beowulf, whose name is commonly translated to "bee's wolf" or "bee-hunter", which describes a "honey-eater", so a bear!

Since Beorn's honey cakes are "twice baked" according to the book and supposedly similar to cram, the Hobbit hardtrack (though tastier than that), and also similar to Lembas, the Elvish travel food, they are probably quite dry and firm. It's even possible that Tolkien had something like Italian Biscotti in mind, since the Latin (panis) biscoctus means "(bread) twice-baked".

After comparing 16 different recipe options, however, I decided to make a fluffier cake for my take on this recipe with ingredients based on the Dutch honey cake (Honingkoek) that is typically enjoyed with lashings of butter for a traditional breakfast in the Netherlands. I also drew inspiration from the Dutch and Flemish spiced breakfast cake (Ontbijtkoek) that bears similarities to gingerbread. (bears, gettit? ... never mind ...)

Anyway, here are my fluffy sweet honey cakes!


BEORN'S VEGAN HONEY CAKES

Preparation time: 50 mins
Main ingredients: spelt flour, almonds, honey / golden syrup
difficulty level: easy
makes: 12 cakes (9-inch square brownie pan)
suitable for: vegan, lactose-free, wheat-free, yeast-free, soy-free

Ingredients

dry ingredients:
2 cups spelt flour (type 1050) *
1/2 cup almonds, finely ground
2 tsp baking soda
1 tsp baking powder
1/2 cup brown sugar or raw cane sugar
1-2 tsp ground cinnamon
1/2 tsp ground cardamom
1/2 tsp fresh minced ginger OR 1/4 tsp ground ginger
1/4 tsp ground nutmeg
1/8 tsp ground black pepper
pinch of salt
1 tsp orange zest

wet ingredients:
1/2 cup of liquid mountain honey or clover honey (or vegan "honey" or golden syrup
or dark molasses, for vegan version)
1/4 cup of golden syrup (
or dark molasses – NOT blackstrap molasses!)
1/4 cup of soy milk
(use soy milk or pea milk to achieve vegan "buttermilk" that curdles)
1/2 cup vegan butter or margarine
1 tsp apple cider vinegar (or lemon juice)

3 tbsp golden syrup or liquid honey + 2 tbsp water for soaking


* If you are confused about that flour type, check out this website which explains the difference between German flour types and US-American flour types.  


Instructions

Preheat oven to 180 °C / 350 °F. Line a 9-inch square brownie pan with parchment paper.

In a mixing bowl, sift together the dry ingredients except for the sugar. Stir. In a separate bowl, cream together the butter/margarine and sugar. Mix soy milk with apple cider vinegar or lemon juice to form vegan "buttermilk". Add this to the butter mixture. Lastly, add honey and syrup. Add the wet mixture to the dry mixture, and combine.

Pour the batter into the prepared brownie pan.

B
ake in the preheated oven at 180 °C / 350 °F for approximately 25 to 30 minutes, or until the cake is golden brown and a wooden pick inserted in the centre comes out clean.

Remove the pan from the oven. Brush the still warm cake with some diluted golden syrup or liquid honey if you like. This is optional, as the cake is plenty sweet on its own. Decorate with orange zest or leave plain. *

Run a knife (preferably of Gondolin or Númenórean make – no Morgul blades!) around the side of the cake, and slice into brownie-sized squares.


Cool in the pan and serve warm or cold and slathered with butter, custard, ice cream or whipped cream.
Beware, hobbits and dwarves are known to be prodigious eaters, so a single cake will not be sufficient for large parties!

Stored in an airtight container this cake will keep for at least four days. In fact, it becomes even more delicious if you keep it for a couple of days wrapped in foil or wax paper.

Cut into individual squares or slices, this can also be kept in the freezer for up to two months.


NOTES:

- Instead of making the cakes brownie-shaped you could also transfer the batter into a greased 9x5 inch  loaf pan or a greased muffin pan, or into lined cupcake tins, filling each cup 2/3 full.
- * You can also top off the cake with a proper glaze. In a small bowl, mix icing sugar, unsalted butter, lemon or orange juice, and vegan whipping cream. Spread all over the cake(s) using a spatula. Top with a handful of chopped toasted walnuts or almonds, and orange zest.
- If you like, you can also replace part of the plant-based milk with 4 tablespoons of Scotch whiskey or rum. You could even replace all of the milk with freshly brewed, cooled strong coffee.


Looking for more nerdy recipes? Check out some of my other literature-inspired creations:

Sansa's Lemon Cakes (vegan)
Bilbo's Seed Cakes (vegan)


♥

Maisy


 reading time: 2 min


Hello fellow chocolate lovers,

as I am still currently buried in work for this year's NaNoWriMo, here's a quick little recipe for you that I (or actually, more like my fiancé J) made for our friend's baby shower last month.

If you've been a loyal reader of my blog for a looong time, you may remember that I made a coconut milk based low carb vegan Mousse au Chocolat for a Murder Mystery Dinner Party five years ago (which was hosted by the same friend who is now expecting a baby!! I just realized, haha) – and I may or may not have promised you back then that I would make a version with silken tofu instead in the future ... well, five years later, here we are!

Other than that my blogging (or at least photography) skills have improved since then, I don't really recall whether the coconut milk version or this silken tofu version tastes more original, but I can tell you that the coconut milk one was fluffier than this one, which is more firm and doesn't taste like coconut – yay! And don't you worry. You can't taste the tofu in this one at all!

Plus, you only need 4 ingredients to make this silky vegan Mousse au Chocolat with a deliciously deep chocolate flavour.

It's
creamy
rich
chocolaty
silky-smooth
satisfying
high-protein
low-fat
vegan
and super delicious!

Besides baby showers, this decadent but healthy-ish Mousse au Chocolat makes for a wonderful dessert for Samhain, Yule, or Valentine's Day.

This recipe should be made ahead of time as the mousse is best served after a few hours of refrigeration or even the next day!

 reading time: 3 min


I'm a sucker for milk tea.

Whether it's black tea, chai tea, roiboos tea, or matcha –– they all taste better with a splash of milk in it! Plant-based milk, of course.

So after making my very first Dirty Chai last week, I was determined to make another milky tea beverage that fit the mood of dark and cold November nights perfectly: LONDON FOG.

I've always loved the name of this beverage. A name that immediately brings the smoky streets of a Victorian London to mind, horse-drawn carriages rattling over rain-slicked cobblestone, giggling girls in corsets making their way home, lit only by the blotchy egg yolk yellow light of the dim street lamps, and Jack the Ripper lurking somewhere in the murky shadows.
 
Or perhaps my imagination is just running wild, lol.

London Fog is a delicious aromatic Earl Grey tea latte with vanilla that compliments the citrusy bergamot flavour of the Earl Grey. It's creamy, it's warm, it's vanillary sweet and indulgent. Just the right cup of tea to cosy up on the couch with on a hazy November afternoon.

I can definitely see Sherlock Holmes or Miss Marple sitting at the window, sipping their London Fog while they rack their brains over some tricky crime case ...


VEGAN LONDON FOG

Preparation time: 10 mins
Main ingredients: oat milk, Earl Grey, vanilla, sugar
difficulty level: easy
serves: 2
suitable for: vegan, lactose-free, gluten-free, soy-free, nut-free

Ingredients:

1 1/2 cups boiling water
1 cup full-fat oat milk *
2 Earl Grey tea bags or 2 tsp loose leaf Earl Grey tea

2 tsp raw cane sugar or coconut blossom sugar
1 tbsp vanilla extract

* In order to achieve the desired creaminess I find that you get the best results when using either the
Alpro Not M*LK with 3.5 g fat per 100 ml, or the Oatly Oat Drink Barista Edition with 3.5 g fat per 100 ml, or their Oat Drink Whole with 2.8 g fat per 100 ml. You could also try vanilla sweetened milk, and omit the vanilla extract!

Instructions:

Steep the tea in freshly boiling hot water for 5 to 7 minutes until quite dark and strong.
Remove the teabag or infuser.

Add vanilla essence and sugar, and stir to dissolve.

Divide the sweetened tea between two cups. Each cup should be filled at least two thirds of the way with the tea.

Steam the full-fat oat milk, using a frother or an immersion blender, and pour it into the tea over a spoon to create that "foggy" effect. Top off with frothed milk.

Serve immediately. Cheers!


To make an iced London Fog:
 
Steep your tea in boiling water. Allow to steep for 5 to 7 minutes for a strong brew, then whisk in the vanilla and sugar to dissolve.

Discard tea bags, and allow the tea to cool.

Pour the cold tea into a glass filled with ice. Finish off with full-fat oat milk to make it nice and creamy. Serve and enjoy immediately.

SO GOOD.


TIPS:
- To make this rich beverage even more decadent, omit the water, and steep your Ear Grey tea in 2 1/2 cups of full-fat oat milk that you heat up in a small saucepan. Stir in sugar and vanilla extract, pour into your favourite mug, and enjoy!
- For another variation, try with a vanilla-sweetened milk, and omit the sugar and vanilla extract.
- If you don't have a milk frother or an immersion blender, pour the milk into a jar with a lid – no more than a third of the way full. Seal the jar with a lid and give it a good shake for about 30 seconds or so. That's actually what I did in this recipe!


Did you know that the "London Fog" was not invented in London, but in Vancouver in 1996 by a woman named Mary Loria who was pregnant at the time and was looking for an alternative to coffee in a café? Apparently, there's also a variation with Matcha green tea, called "Tokyo fog", and a variation with rooibos tea, called "Cape Town fog", as well as the "Bangalore fog" or "Bombay fog" that uses chai tea instead of Earl Grey. There's even a drink called "London Smog" that is made up of the same ingredients as a regular London Fog, but with the addition of a shot of espresso. So basically ... a Dirty Earl?!

While I do enjoy a cup of decaf coffee every once in a while, I am definitely more of a tea drinker. What about you? Are you team tea or team coffee? Or both? (Dirty Chai?!)


♥

Maisy

reading time: 6 min


Last year I shared how to make your own food dumplings for wild birds (and squirrels), so this time I want to show you my favourite DIY bird feeding station – using a flower pot! If you want to make this the easy way, just use a store-bought birdseed mix. However, I usually make my own customized birdseed blend. Recipe below!

Bird feeders are very easy to make yourself. Not only are they a great way to get crafty with kids, but they also help our local birds through the winter.

The great thing about this bird feed is that it's reusable! All you need to do is buy the perishable ingredients each winter, melt them all together, and fill up the reusable flowerpot. But more on that below ...

IMPORTANT: You can use your bird feeder during the months of November until late February, or late March. Do NOT continue to feed the birds in the spring because they will pass on the grainy birdseed to their young, which can't digest the heavy food and might even die from it! So no bird feeding after March!!

  reading time: 3 min


Confession time: I had never heard of a "dirty chai" before recently watching Rachel Talbott's video on seasonal home maintenance – I absolutely adore her videos, especially the ones about gardening and housekeeping!!

So in case you aren't familiar with the concept of dirty chai either: It's a hot or cold beverage that consists of a single shot or double shot of espresso mixed into a spiced chai tea (masala chai) that is usually made with a chai concentrate. Combined with frothed milk, you've got yourself a mix between a regular latte macchiato, and a chai tea latte –– a DIRTY CHAI latte!


This beverage is also known as espresso chai or java chai.

Loving both chai tea and (decaf) coffee, I was immediately intrigued and decided to make my own dirty chai latte as soon as possible – not the iced version though, as we are already in the midst of a grey and rainy autumn here in Northern Germany.

And what can I say?
It's creamy, it's silky and milky, and fragrantly spiced with a mild coffee flavour – and I love it!!

So here's how you can make your own!


VEGAN DIRTY CHAI

Preparation time: 15 mins
Main ingredients: oat milk, chai tea, coffee
difficulty level: easy
serves: 2
suitable for: vegan, lactose-free, gluten-free, soy-free, nut-free

Ingredients:

1 1/2 cups full-fat oat milk *
1/2 cup boiling water
2 chai tea bags (or make your own chai spice blend, and use 3 tsp of that in this recipe along with 2 bags of black tea or rooibos tea)

1/4 cup hot strong coffee or 1 shot espresso, freshly brewed (I use decaf coffee)
2 tsp raw cane sugar or coconut blossom sugar or maple syrup
1 tsp vanilla extract

cinnamon, to garnish

* In order to achieve the desired creaminess I find that you get the best results when using either the Alpro Not M*LK with 3.5 g fat per 100 ml, or the Oatly Oat Drink Barista Edition with 3.5 g fat per 100 ml, or their Oat Drink Whole with 2.8 g fat per 100 ml. You could also try vanilla sweetened milk, and omit the vanilla extract!

Instructions:

Place the 2 tea bags in a mug and cover with 1/2 cup of boiling water. Allow to steep for at least 10 minutes (along with the spice blend, if using), then whisk in the sugar and vanilla extract to dissolve. The longer the tea steeps, the more intense the flavour will be!

Discard tea bags.

In a small saucepan, heat up the full-fat oat milk until simmering. Remove from heat, and use a milk frother or a handheld immersion blender to foam up the milk.

Divide the strong sweetened chai tea between two mugs. Pour the frothed milk over the top of the hot drink. Lastly, pour in the hot strong coffee or espresso.

Top with cinnamon and/or a small cinnamon stick.

Serve hot. Enjoy!


To make iced dirty chai:
 
Place the 2 tea bags in a mug and cover with 1/2 cup of boiling water. Allow to steep for at least 10 minutes, then whisk in the sugar to dissolve.

Discard tea bags, and a
llow the tea to cool.

Divide a handful of ice between your glasses, and pour the cold tea over the ice. Add espresso. Then pour refrigerated full-fat oat milk on top. Serve and enjoy immediately.


TIPS:
- To make this recipe even more decadent and rich, omit the water, and simmer your tea bags (along with the spice blend, if using) in 2 cups of full-fat oat milk, then reduce stove heat to low, and steep for 10 minutes. Remove from heat, add coffee, sugar and vanilla, and enjoy!
-
If you don't have a milk frother or an immersion blender, pour the milk into a jar with a lid – no more than a third of the way full. Seal the jar with a lid and give it a good shake for about 30 seconds or so.


♥

Maisy

Newer Posts Older Posts Home

THIS IS ME

Well, hello! My name is Maisy (pronounce: macy) and I’m the creative spirit behind this blog. You are welcome to join me on my journey to a more natural, slow-paced & healthier life!

SUBSCRIBE & FOLLOW

TRENDING THIS MONTH

  • How To Marie Kondo Your Life (and not just your stuff)
  • Hot Wintry Butterbeer (vegan)
  • DIY Easy Electroculture Plant Antenna
  • Ayurvedic Breakfast Porridge (+ the best granola topping ever!)
  • Healthy Banana Split Brownies (vegan)

Categories

  • Ayurveda 17
  • beauty 39
  • breakfast 71
  • dessert 204
  • diy 48
  • fermenting 6
  • fictional food 19
  • foraging 25
  • gardening 8
  • gluten-free 128
  • healing 67
  • herbs 21
  • homestead 109
  • main course 43
  • minimalism 38
  • snack 100
  • sugar-free 112
  • zero waste 44

GET IN TOUCH

Name

Email *

Message *

Powered by Blogger.

Archive

  • ►  2023 (9)
    • ►  March (3)
    • ►  February (3)
    • ►  January (3)
  • ►  2022 (65)
    • ►  December (5)
    • ►  November (3)
    • ►  October (5)
    • ►  September (5)
    • ►  August (6)
    • ►  July (6)
    • ►  June (4)
    • ►  May (6)
    • ►  April (5)
    • ►  March (7)
    • ►  February (7)
    • ►  January (6)
  • ▼  2021 (60)
    • ▼  December (5)
      • Mrs. Weasley's Christmas Fudge (vegan)
      • Twelvetide Rituals | The Twelve Days of Christmas
      • Vegan Sweet Yeast Braid for the Holidays
      • Vegan German Black Forest Cake (Schwarzwälder Kirs...
      • DIY Hair Growth Oil
    • ►  November (6)
      • Beorn's Honey Cakes (vegan)
      • Silky Vegan Mousse au Chocolat
      • Vegan London Fog
      • Easy DIY Bird Feeder (zero waste)
      • Vegan Dirty Chai Latte
    • ►  October (6)
    • ►  September (8)
    • ►  August (6)
    • ►  July (7)
    • ►  June (6)
    • ►  May (5)
    • ►  April (4)
    • ►  March (3)
    • ►  February (3)
    • ►  January (1)
  • ►  2020 (22)
    • ►  December (1)
    • ►  July (1)
    • ►  June (4)
    • ►  May (6)
    • ►  April (1)
    • ►  March (2)
    • ►  February (5)
    • ►  January (2)
  • ►  2019 (22)
    • ►  December (2)
    • ►  October (4)
    • ►  September (4)
    • ►  August (3)
    • ►  June (2)
    • ►  April (2)
    • ►  March (2)
    • ►  February (1)
    • ►  January (2)
  • ►  2018 (68)
    • ►  December (1)
    • ►  November (2)
    • ►  October (1)
    • ►  September (4)
    • ►  August (2)
    • ►  July (10)
    • ►  June (4)
    • ►  May (5)
    • ►  April (8)
    • ►  March (12)
    • ►  February (8)
    • ►  January (11)
  • ►  2017 (154)
    • ►  December (13)
    • ►  November (10)
    • ►  October (35)
    • ►  September (13)
    • ►  August (11)
    • ►  July (9)
    • ►  June (1)
    • ►  May (13)
    • ►  April (13)
    • ►  March (16)
    • ►  February (11)
    • ►  January (9)
  • ►  2016 (101)
    • ►  December (9)
    • ►  November (13)
    • ►  October (9)
    • ►  September (12)
    • ►  August (9)
    • ►  July (14)
    • ►  June (9)
    • ►  May (6)
    • ►  April (7)
    • ►  March (3)
    • ►  February (5)
    • ►  January (5)
  • ►  2015 (75)
    • ►  December (6)
    • ►  November (2)
    • ►  October (2)
    • ►  September (7)
    • ►  August (2)
    • ►  July (24)
    • ►  June (6)
    • ►  May (6)
    • ►  April (5)
    • ►  March (8)
    • ►  February (6)
    • ►  January (1)
  • ►  2014 (41)
    • ►  December (2)
    • ►  November (2)
    • ►  October (2)
    • ►  August (2)
    • ►  July (15)
    • ►  June (3)
    • ►  May (4)
    • ►  April (6)
    • ►  March (2)
    • ►  February (3)
  • ►  2013 (7)
    • ►  December (2)
    • ►  October (1)
    • ►  September (3)
    • ►  June (1)

SEARCH THIS BLOG


total page views

Most Popular Posts

  • Dark Chocolate Avocado Brownies (vegan & gluten-free)
  • 12 Easy Hairstyles For Shoulder Length Hair | Long Bob
  • Ayurvedic Breakfast Porridge (+ the best granola topping ever!)

Privacy Policy


Copyright © Homestead Herbs & Healing | holistic living. Designed by OddThemes