reading time: 19 min
“To be creative means to be in love with life.
You can be creative
only if you love life enough that you want to enhance its beauty,
you
want to bring a little more music to it, a little more poetry to it, a
little more dance to it.”
– Osho
With the National Novel Writing Month (NaNoWriMo) around the corner, I'm once again faced with mustering my creative energies in order to write a total of 50,000 words this November.
I can't tell you how often I've heard (and said!) the sentence: "I'm just not creative." Or: "I don't feel inspired today." Being not only a teacher of Creative Writing at my local university, but also a freelance editor and even more importantly a long-time writer, I am constantly confronted with the concept of inspiration, creativity and – sigh – creative block.
In general, a creative block or artist's block describes a period of time where we lack inspiration to create something and lose the ability to create new work.
Every artist's worst nightmare.
Most people are probably familiar with the term "writer's block", but actually it's never really a problem of not being able to "write" – but it's usually to do with unrealistic expectations, too many distractions, creative burn-out, overwhelm, an uncertainty about where to go next, or a lack of faith in your project. Luckily, those are all problems you can find a solution for.
So here are my tips on how to beat a creative block and get inspired again!
In other words:
HOW TO BE CREATIVE WHEN YOU DON'T FEEL LIKE IT
Don't Feel Bad About It
Before we try to figure our why we feel this way and what we can do about it, we first have to just accept the fact that we feel this way. And that it's okay to feel this way. We all have days like that.
I know, this is probably not what your were hoping to hear as the first tip, but honestly: Don't feel bad about feeling uncreative and uninspired. It's totally normal and okay! Trust me, every single creative person feels this way at some point in their lives. However, what separates a full-time artist from an occasional artist is how they handle this obstacle.
Find the Root of your Creative Block
The first step towards getting past a creative block is figuring out the reason for it. Depending on what the root of your creative block is, you are going to handle and approach it in very different ways. The most common reasons for a creative block are: lack of passion for the project (or life overall), lack of clarity, perfectionism, fear of failure, self-doubt, feeling overwhelmed, being emotionally distracted with personal problems, or burnt-out.
Knowing what causes your creative block, you will know how to overcome it.
For example, if you aren't passionate about the project, either find another project that does spark joy and passion and creativity in you, or – if jumping from one unfinished project to the next seems to be a reoccurring problem – try to locate why this happened. What has changed? What is blocking your way? Perhaps your priorities have changed?
If you are suffering from your nagging self-doubt and thoughts of "I can't do this, I'll never be as good at this as xyz", it's probably best to focus on doing things that boost your self-confidence and lifts your spirits. What makes you feel good? Make a list of things that make you feel happy, inspired or creative. For me, this is dancing, singing, gardening, doing pottery, spending time with pets, and reading great books. Do these things as often as possible to re-connect with your inherent feelings of joy and excitement!
In the case of perfectionism and fear of failure preventing your from trying, it can be helpful to force yourself to do it "badly" and accept the flaws – whereas during a phase of emotional distractions or life's external events (e. g. grief, divorce, exam phase, childbirth etc.), allow yourself to take a break from your projects altogether.
If you have reached a dead end with your project, and feel stuck in that way, then chances are that you either don't know enough about your project (i. e. your story or your fashion design), or you took a wrong turn and need to backtrack. If the latter is the case, then you need to retrace your previous steps and take a different path at an earlier point (e. g. change the narrative perspective of a movie scene, or change your story's protagonist, or choose a completely different painting style to what you usually do).
If you simply don't know enough about your project and face a wall because you haven't properly explored an idea enough to be able or willing to spend time with it, simply do a brainstorming session to clarify any ambiguities. Planning your next steps and defining an end goal – that might still change overtime, but will serve as your roadmap – is an important part of preventing and overcoming a creative block.
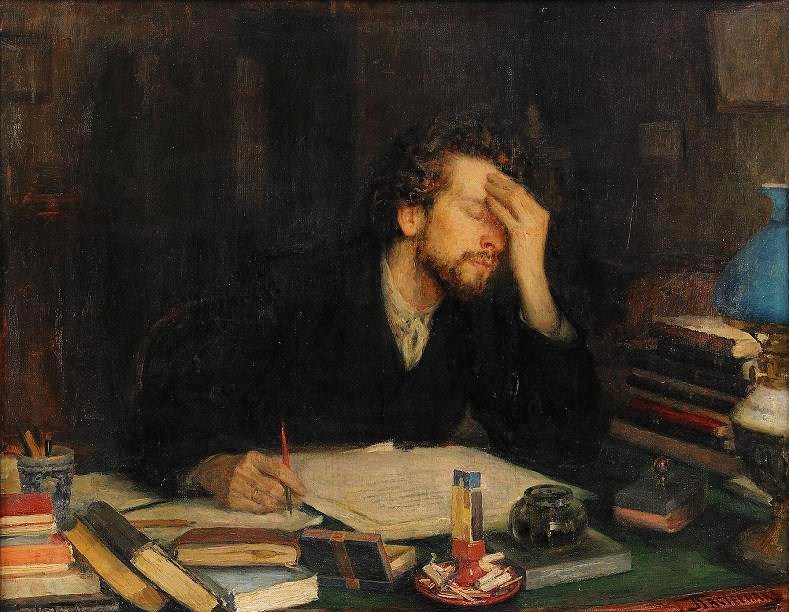 |
| "The Passion of Creation", Leonid Pasternak, late 19th century (source) |
Find your "Why"
When you are struggling to feel inspired and creative, remind yourself of your motivation. Whenever I start a new creative writing course at my university, I always ask my students at the beginning of the first lecture why they are here. What are they hoping to learn from this class? And most importantly, why do they want to write?
The trick to achieving anything in your life is to identify your "Why Power" – in this case, identifying why it's even important for you to be creative. So ask yourself:
Why do you want to create?
What was it about that specific project that initially
fascinated you?
What is it that you want to shout from the rooftops?
Once you know your "Why", once you remember what it is that you love about making art or finding creative solutions, it will usually loosen the creative block you've been having.
Art and creation is supposed to be fun! What makes it fun for you?
Another great way to remind yourself of your passion for your challenging project is to write down what is special, exciting, funny, moving and unique
about your project! If that doesn't get you excited, create a mood board for your project (e. g. your story or your music) or a vision board for what you
love most about your creative work. Or write down what other artworks you know are
similar and what you find most interesting or great about them. Or look at a creative project of yours that you really like, and motivate yourself that way.
In my case, it always helps to read novels by my favourite authors that I love and that make me want to "write a book that is as great as that".
Keep your "Why" in mind all the time – it can help to put a sticky note or an image or something that reminds you of your "Why" at your desk or on a nearby pinboard. Saving your inspiring vision board as your computer wallpaper also helps with that.
Purpose begets passion.
Use Creative Sprints
Sometimes the task of sitting down to work on a creative project for hours or even days can be intimidating and overwhelming, and the very idea drains you of any energy and creativity you've had.
But what if you trick yourself into getting some creative work done even if you don't feel like it, using small, achievable goals?
With creative sprints you set a timer for a specific short period of time (anything from 5 to 45 minutes works great, in my experience), eliminate all distractions, and then do nothing but work on your creative project for that set time. And that's it.
For my writing, I love to use writing sprints or write-ins (such as the ones from Kate Cavanaugh) to get my work done in short, but productive intervals, especially during NaNoWriMo with a daily word count goal of 1,667 words.
So if you don't have the motivation right now to work for 2 hours or to write 2000 words, maybe you can manage to work as little as 10 minutes or 100 words instead!
Either set a timer for a certain time, or set yourself a word count goal, or some other tangible goal, depending on your creative work. Once your timer goes off, or you've reached your goal, maybe you feel like you could do another 10 minutes of work, or another 100 words. And so on ... until you've tricked yourself into working those 2 hours after all!
Or not, and that's fine too. Take the pressure off. Just do what you can.
Personally, I have found that the Pomodoro Technique (where you spend 25 minutes working focused and distraction-free, then take a 5 minute break, and repeat three times, so a total of 2 hours) works best for me. My current favourite pomodoro sprints are this motivating 25 Minute Epic Fantasy Music Writing Sprint by Bethany Atazadeh as well as these 2 Hour 25/5 Study Sprints by Inner Academia and various of the Fantasy-Themed Pomodoro Study Sessions by Peaceful Ambience.
However, on days where I feel completely creatively blocked and uninspired, even 25 minutes can seem daunting, so on these days I will go for maybe 10 or 15 minutes, or a low word count such as 100 words.
In my experience, this will not always lead you to getting more done than you've set out (although it often will), but at least you get a little bit done instead of nothing at all!
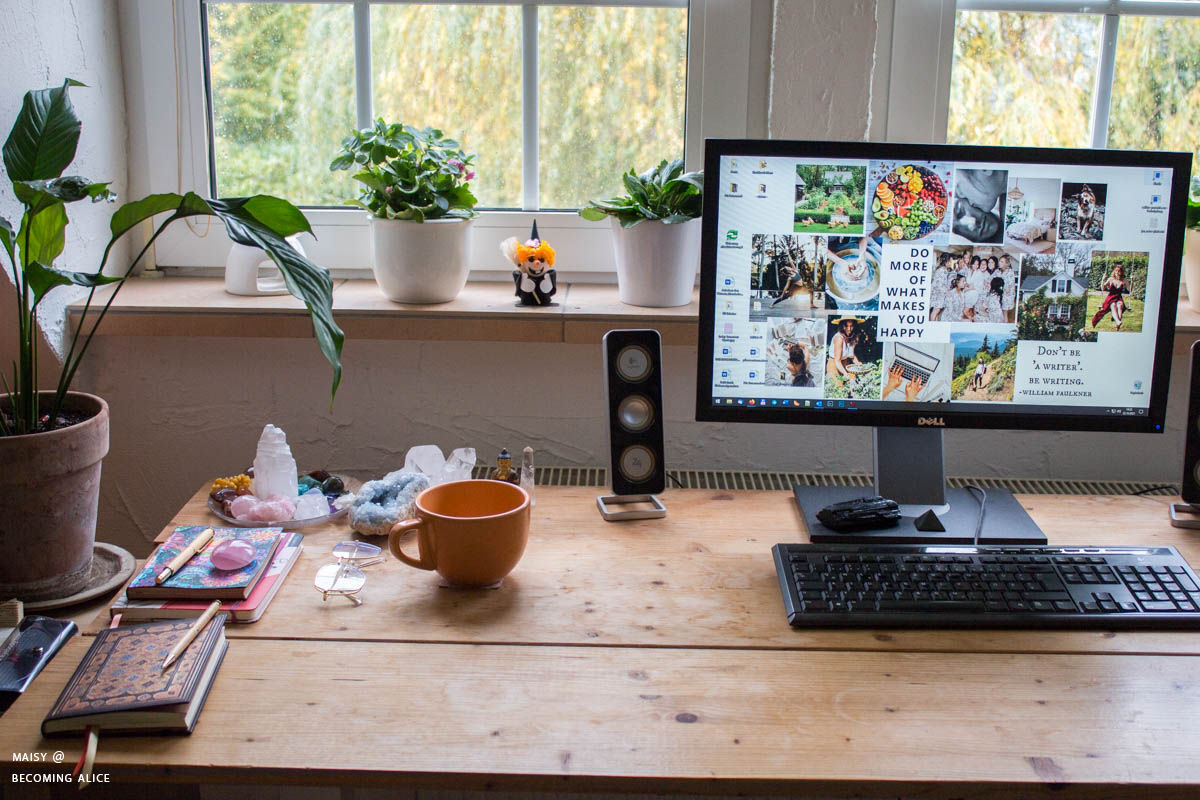
 |
"Maisy without Make-up and with much-too-big Blue Light Glasses", herself, early 21st century 🤓
|
Give Yourself Permission to Suck
This next tip blends into what I said earlier about dealing with the fear of imperfection or failure.
There is something incredibly freeing about giving yourself the permission to do things badly. In fact, I sometimes encourage my students to do the opposite of what they would usually do – to write badly on purpose! It's so much fun to allow yourself / challenge yourself to write the worst piece of literature you've ever written. For example, try to use as many cliches, or as many dumb stereotypes as possible, and write the cringiest dialogues!
Speaking of cringy – did you know that Jim Butcher, the author of the popular contemporary fantasy series The Dresden Files and Codex Alera (both of which I love!), actually wrote one of his first novels as a way to prove to his writing professor how wrong she was about the basic rules of writing she was teaching. By writing exactly to her template, which he thought was boring and awful, he wanted to show her what "cookie cutter pablum crap" emerges from that. The result was the first novel of his Dresden Files series, Storm Front.
So if this teaches you anything – it's that it will always lead to some sort of growth or insight if you leave your comfort zone, even if it might seem like the dumbest idea.
As they say: You can't edit a blank page. And this is so true! So just get your visions onto that page (or canvas, or whatever you're working with), and be okay with it being a hot mess right now. Trust that you will be able to edit and polish it later and make it into something great.
No one is perfect, that's why the pencil has an eraser 😉
Don't beat yourself up because you think what you do isn't "good enough" – this is the most common phenomenon amongst creative people. Of course you want to be as good as you can, and to reach your full potential, but often we have too high expectations that limit our motivation and productivity. There is always room for improvement for everyone, but that doesn't mean you have to beat yourself up. Try to get comfortable with being bad sometimes. It's okay not to be perfect. It's okay to suck.
And remember: You're not failing, you're just finding out what doesn't work!
Get Moving
When you are stuck, it can help to physically get out of your blind alley. Instead of sitting at your desk and complaining about your inability to get creative, get up and go for a walk – this will get you out of your head and into your body. Who knows, maybe it will spark your inspiration. Light exercising like doing yoga or stretching is another great alternative. Or have a crazy dance-off by yourself!
I find that monotonous activities such as cleaning or doing the dishes, mowing the lawn or taking a shower, also have the tendency to give us new ideas. During these activities our thoughts tend to wander, often presenting us with a solution to a problem we've been stewing over for hours and hours.
Sometimes it can also help to focus our attention on other creative activities. For example, if you are a writer like me, perhaps do some doodling or pottery today. If you are a videographer, why not write a poem, or design your dream house, or cook a three-course menu?
"If you get stuck, get away from your desk. Take a walk, take a bath, go to sleep, make a pie, draw, listen to music, meditate, exercise; whatever you do, don't just stick there scowling at the problem."
– Hilary Mantel, author
Take Yourself Out on an Artist Date
The concept of Artist Dates – created by Julia Cameron – was introduced to me a few years ago by the youtube channel Lavendaire. They are meant to spark inspiration and nurture
your creativity by spending quality time alone to explore
something that interests you and recharges your creative batteries.
"Artist
Dates fire up the imagination. They spark whimsy. They encourage play.
Since art is about the play of ideas, they feed our creative work by
replenishing our inner well of images and inspiration. When choosing an
Artist Date, it is good to ask yourself, 'what sounds fun?' — and then
allow yourself to try it."
– Julia Cameron, author of The Artist's Way
So what you can to is set aside time once a week to go out by yourself and do something to push your slightly out of your comfort zone. This could be exploring a foreign city, or trying out a new hobby. It could also be picking up some air-dry clay from an art supply store and getting creative with it. Or spending 24 hours in a 24-hour café and starting fun conversations with strangers. Or going to a park in the neighbourhood and taking pictures of beautiful plants. Whatever your heart is yearning for :)
This can be very helpful to get out of that artist's block because you are 1) doing something fun that makes you happy, and also because you are 2) getting out of your comfort zone and possibly broadening your horizon.
One thing I've been wanting to do for a while is take myself on a writing retreat somewhere remote where I can fully immerse and focus on my story (perhaps even during this NaNoWriMo?) without the distractions from everyday life.
I've also been toying with the idea of taking Caro Arevalo's online course Rituals Around Creativity some time soon. As this is also part of her creativity rituals – perhaps doing a cacao ceremony right before sitting down to work on your project might help you to reconnect with your creative energy.
Whatever you choose, make it fun!
Find & Create Your Creative Zone
Sometimes the reason why we feel uninspired and don't meet our creative goals is that we are just not working in our right rhythm yet! Determining what
time of the day is your most creative time, your "genius zone" – which is not to be
confused with the most productive time in general, as this might only apply to administrative work but not to creative work – will help you get into a state of flow, creativity, energy and fulfilment. For example, I found that in the mornings I am the most productive in terms of getting tasks done, such as answering e-mails, blogging, doing household chores, or planning my next creative writing class. However, I need the comfort of an idle afternoon or evening, or even the late night hours, to get into a creative mindset.
To find out which time of the day works best for you, I
recommend doing creative prompts for a few days in a row: a few days in the morning (6 to 9 a.m.), a few days at noon
(10 a.m. to 1 p.m.), a few days in the afternoon (2 p.m. to 5 p.m.), a few
days in the evening (7 p.m. to 10 p.m.) and a few days at night (11 p.m. to 2 a.m.). Write down how much you got done during each sprint, and also how you felt. At the end of the experiment, simply compare the
numbers and how you felt. That way it should be easier to pinpoint your individual "genius zone".
Besides determining your most creative time of the day, you can also actively create your "creative zone". As I write in my old blogpost on dealing with procrastination, it's vital to tidy up your desk before sitting down to work (otherwise the mess will distract you) and to make your workspace as inspiring and motivating as possible. In my case, this means having some crystals, air-purifying plants, an essential oil diffuser, blue light glasses, my manifestation journal, my planner, my favourite pens, inspiring work-related books, a mug with either warm water or my favourite tea, and a lot of empty space in my home office.
Another great and easy way to get yourself into work mode (or in our case specifically: creative mode) is to dress in a way that signals your body and your brain that it's time to focus and get some work done. Wearing neat "work appropriate" clothes such as comfortable cloth pants and knitted jumpers instead of stained lounge wear has helped me tremendously to separate my at-home work life from my personal life.
Show Up Daily Weirdly, the most effective way to beat a creative block is by giving yourself STRUCTURE and CONSTRAINT. Believe it or not, a creative block will often occur when we have too much free time, or when we don't have enough boundaries to hold us accountable.
As
important as knowing your motivation is, it's not the only thing we
should rely on. Doing the thing even when you're NOT motivated is what
will eventually get you to your goal. We've got lazy brains that just
want to watch Netflix all day instead of actually following through with our projects. We often lack
self-control and/or self-discipline, so we need to just do things even
if we don't feel like it. And then we'll be all the more proud of
ourselves for accomplishing it!
Or to quote another favourite author of mine, Brandon Sanderson: "Success
– in all aspects of life – can often be traced to learning how to make
yourself to do the things you want to have done."
So what are the things that you don't want to do but you want to have done?
In
order to actually do them, it goes back to what motivates you. Is it
the numbers counting up in your word document? Or is it the thought of
sharing your work with others who might be inspired by it? Or being able to make money with something you love doing?
Tying
back to what I've said about using creative sprints as a way to trick
your brain into overcoming that initial overwhelm, you can also sit down
daily and ask yourself this simple question: What is one small step I
can take today that will bring me closer to my goal?
One small step. That's all you've got to do right now.
And then another. And then another. One day at a time.
C
reativity is a muscle, a lot like exercise, and so it's best to practice your creative muscle daily to build strength and also get into the habit of it.
Just like you don't just suddenly get up from the couch after binge-watching your favourite show and eating chocolate all day to run a marathon without training. First, you need to build up your endurance. If you haven't been creative for a while, your creative muscles are weak and atrophied.
So give yourself the necessary structure – such as a daily routine – to build up that stamina to actually be able to work creatively consistently. In his book Keep Going: 10 Ways to Stay Creative in Good Times and Bad Times Austin Kleon puts it like this:
"There will be good days and bad days. Days when you feel inspired and days when you want to walk off a bridge. (...) A daily routine will get you through the day and help you make the most of it. (...) When you don't know what to do next, your routine tells you. When you don't have much time, a routine helps you make the little time you have count. When you have all the time in the world, a routine helps you make sure you don't waste it."
Kleon's advise resembles the procedure of habit stacking. Habit
stacking is a great method to incorporate a new habit into your pre-existing routine, and also to avoid procrastination by letting you flow automatically from one action right into the next action without thinking about it or having the chance to build resistance to it.
What you want to do is link a new
habit (such as sitting down to work on your creative project every day)
to an existing one, such as having a cup of coffee in the morning,
working out, or eating breakfast. For example, you could sit down to
write your to-do list right after having journaled in the mornings, if
that's something you do on the regular, followed by a brainstorming
session for 15 minutes, and then a writing session for 45 minutes. Or if
you are more of a night owl, you could make it a habit to compose music
for 1 hour right after eating dinner, or edit a youtube video before
allowing yourself to have dessert.
To some of you a strict routine like this may sound restrictive. But a little restriction – when it is self-imposed – can be very liberating. To quote Austin Kleon again: "Rather than restricting your freedom, a routine gives you freedom by protecting you from the ups and downs of life and helping you take advantage of your limited time, energy, and talent. A routine establishes good habits that can lead to your best work."
Finish What You've Started
This can be hard advice to hear, but it's one of the most important lessons I have learnt so far: Finish your project!
I know this feels counter-intuitive in some situations – for example when you seem to have lost all interest and passion for your project and really want to adopt a shiny new plot bunny that seems way more appealing at the moment –, but sticking to one project and seeing it through instead of throwing in the towel whenever it gets difficult, is a valuable lesson not only regarding your creative career, but also in life in general.
Whether it's a poem or a novel or a music piece – get to that ending. You can always revise it later, and even change the whole thing, if necessary. You will learn more by finishing one project than by starting 100 projects that never get past the midway point.
The more often you build up this perseverance of working on your creative project when you don't want to and not giving up, the less often you'll actually want to give up, and the less often you'll find yourself in a "creative block".
If
you stop working on a project every time it gets bumpy and challenging and go
straight to the next tempting new idea, you will never grow beyond those
challenges. Even if you finish the project and discard it immediately
afterwards, the very process of sticking with it to the end will noticeably
improve your skills – and it will be significantly easier to finish your next project instead of dropping it at the next best opportunity.
So whatever you do, commit yourself to it fully. Keep going. Finish what you have started!
I hope this article helped you in some way, and that you feel prepared to get (yourself) out of a creative slump anytime. Don't be disheartened. Courage, dear heart :)
In the comments, I’d love to hear how your creative projects are going. What are you working on right now?
You might also find these helpful:
♥
Maisy


)