reading time: 9 min

We all know I love my yeast, I love my challah and my bread rolls (😍)
But for quite a while now I have been having a bit on the side ... with SOURDOUGH!
Yes, sourdough – the ancient baking tradition that had its comeback during covid along with banana bread and focaccia gardens (and pancake cereal and dalgona coffee which I still have not tried, and probably won't ...)
I have to admit that I also jumped on this bandwagon, and since April of this year it's also a staple in our kitchen, along with homemade kombucha and vegan yogurt.
But, to my defence, I had been wanting to make my own sourdough starter for years now – but for some reason it always felt so daunting! (Although it really doesn't have to be.)
Basically, sourdough can be used as a substitute for leavening agents such as baking powder and yeast – although sourdough also contains yeast. While baking powder can be used in recipes like my easy vegan marble muffins without any waiting, and yeast can also be used for baking with quicker results like my vegan strawberry streusel coffee cake which has a rising time of 60 minutes, sourdough needs more time and planning ahead. Like 12 to 24 hours 😅
But don't get discouraged, it's worth it! (And it's really only a couple of minutes of actual preparation time.)
So why use sourdough?
Well, for one thing, it is very healthy. As a fermented food, sourdough contains a lot of valuable lactic acid bacteria, as well as rich in antioxidants and nutrients like calcium, potassium, magnesium, folate, and niacin. "According to some studies, sourdough bread acts as a prebiotic, which means that the fiber in the bread helps feed the “good” bacteria in your intestines. These bacteria are important for maintaining a stable, healthy digestive system. Sourdough is also lower in gluten than other forms of bread. It appears that the acid in the bread degrades gluten. As a result, people with gluten intolerance may find that sourdough is easier on their stomachs." (source)
What's
so fascinating about sourdough to me is that it grows its own yeast from nothing but flour and water! 🤓 So basically, when making sourdough bread, instead
of using baker's yeast from the supermarket, you use your own starter
(a mixture of flour and water which you then ferment as described below) that contains a
population of wild yeast that has naturally been developed during fermentation. And guess what, if you grow a sourdough culture for a while, it will develop a unique microflora adjusted to you and your household! Cool, huh?
It is the oldest type of leavened bread, and apparently it is the only way to make bread digestible and nutritious for us humans – thanks to the microbes present in sourdough that break down the anti-nutrients like phytic acid which otherwise would hem the absorption of minerals like iron, magnesium, and zinc.
It is the oldest type of leavened bread, and apparently it is the only way to make bread digestible and nutritious for us humans – thanks to the microbes present in sourdough that break down the anti-nutrients like phytic acid which otherwise would hem the absorption of minerals like iron, magnesium, and zinc.
And the best thing is: It's basically self-sufficient! Once
you have your starter, this gives you an endless supply of yeast /
starter to use for making bread! (or bread rolls or pancakes or pasta or
pizza or bagels or muffins or cinnamon rolls or challah or, yes, banana
bread as well and also a focaccia garden 😉)
What is "dry" sourdough starter?
What is "dry" sourdough starter?
A dry, firm or stiff sourdough starter refers to the ratio of flour and water which is 2:1 instead of 1:1 for a "regular" wet sourdough starter. It uses the same feeding method as the Italian Lievito Madre which means that it uses twice the amount of flour, resulting in a more stiff, firm or dry starter.
(The Lievito Madre, however, uses wheat flour instead of rye flour which is common for regular sourdough. It also typically contains a bit of olive oil and honey, which isn't mandatory for a dry sourdough starter, but can be added if desired. See instructions below.)
Tastewise it is milder than the "wet" sourdough, which makes it very suitable for sweet pastries such as pancakes, hot cross buns, or banana bread.
This method is less common than the wet sourdough and is adapted from Shaye over at The Elliott Homestead who in turn learnt this method from Carla from Jovial Foods.
The huge advantage of dry sourdough as opposed to wet sourdough, in my opinion, is that you only need to discard part of the starter ONCE at the very beginning, and only need to feed it ONCE A WEEK or up to 2 weeks once it's established. In comparison, the regular wet sourdough starter needs to be fed and discarded daily.

Preparation time: 7 days
Main ingredients: unbleached flour, filtered water
difficulty level: easy
makes: 1 batch of dry sourdough starter
suitable for: vegan, lactose-free, soy-free, sugar-free, oil-free
Ingredients
~ 340 g unbleached flour (unbleached all-purpose wheat / spelt / rye / einkorn are great; I use organic 1050 type spelt flour)
~ 185 g warm filtered water
(optional) 1/2 tsp organic extra-virgin olive oil
(optional) 1/2 tsp organic honey
also:
a large, air-tight glass container, about 3 cups / 750 ml in size (I use a flip-top jar)
a wooden or non-metal spoon, or silicone spatula
a digital kitchen scale
 |
| To make your own sourdough starter you only need two ingredients: flour and water. |
Day 1:
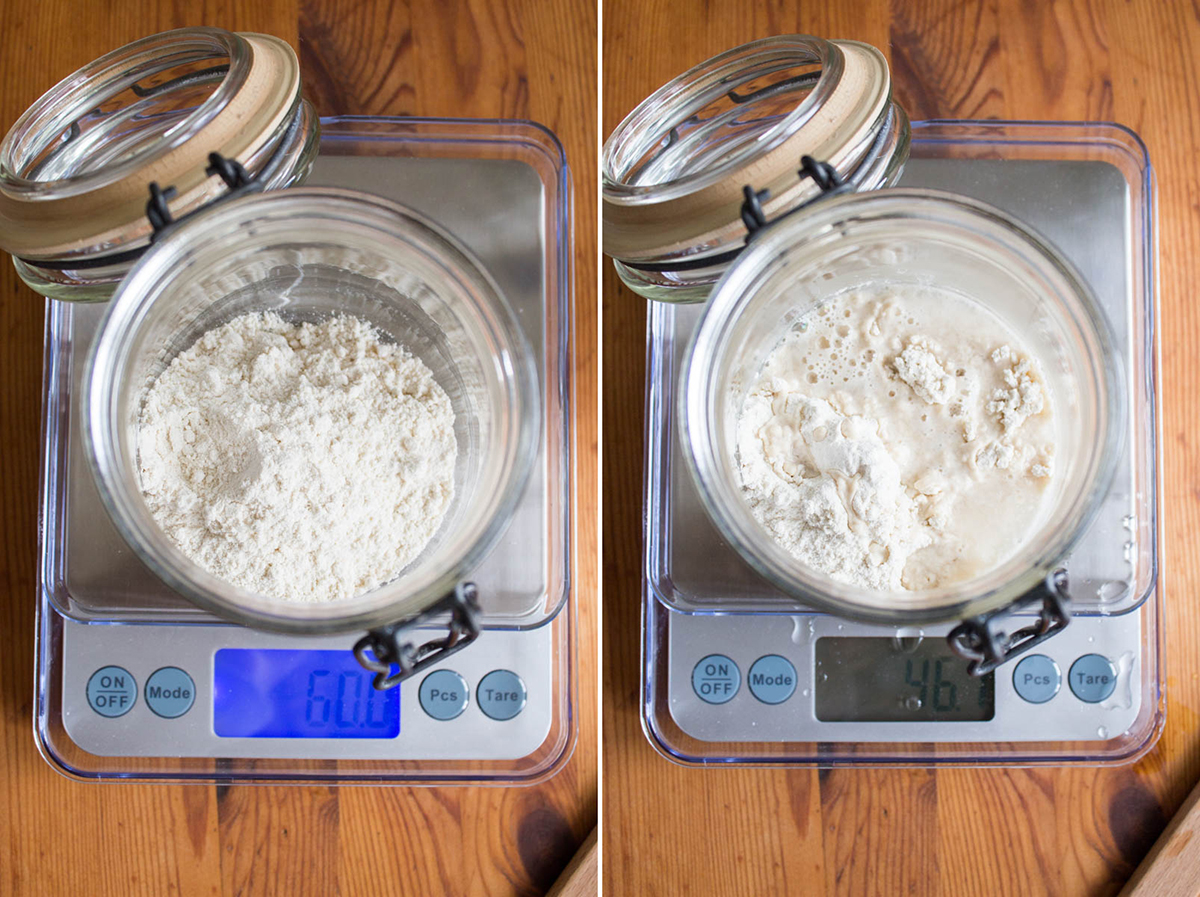
Mix 60 g of unbleached flour (I used spelt flour type 1050, but you could use something like spelt bread flour) and 45 g of warm filtered water in a large non-metal bowl such as glass or ceramics. If you like, you can also add 1/2 tsp of olive oil, and 1/2 tsp of honey to the mixture for an authentic Lievito Madre.
Flour your clean hands and pick up the soft dough, working it gently for about 30 seconds.
Place the soft dough ball in a clean glass jar with a lid, and set it aside in a warm room temperature place away from cold drafts. I put mine in the warm boiler room of our house where we also keep our homebrewed kombucha.
Allow it to sit for 48 hours.


Day 3:
Two days later, remove the lid from your jar, and scrape away the light-gray surface that has probably developed using a fork. (This stems from oxidation and is not the same as mould! If anything gray or dark and fuzzy has appeared, your starter has gone bad and needs to be tossed, sadly!)
Transfer the remaining starter to a clean bowl, and add 60 g of flour and 30 g of water to it. Stir well until well combined. Again, lightly dust your hands and work the dough gently until smooth.
Transfer to a clean glass jar with a lid, cover and place back in the same spot for 24 hours.


Days 4 + 5:
Transfer the remaining starter to a clean bowl, and add 60 g of flour and 30 g of water to it. Stir well until well combined. Again, lightly dust your hands and work the dough gently until smooth.
Transfer to a clean glass jar with a lid, cover and place back in the same spot for 24 hours.


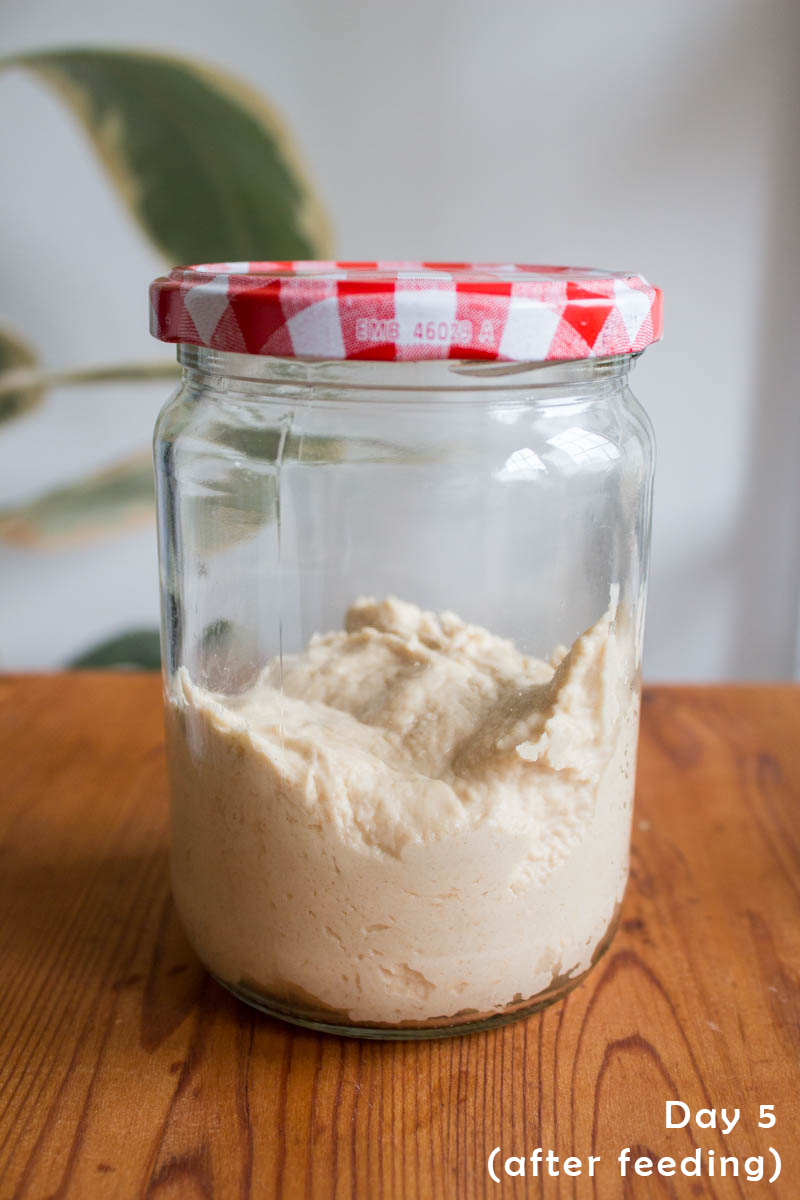
Days 4 + 5:
Repeat the process from day three.


First bubbles are starting to appear!


Day 6:
On day six, this is the only time we'll ever throw away part of the starter: Add 20 g of your starter to a bowl, and discard the rest.
To the bowl, add 50 g of water, and stir well to combine. Add 100 g of flour, and mix well. Once again, dust your hands slightly with flour and pick up the dough to knead it gently until smooth.
Transfer the starter to a clean glass jar with a lid or a Tupperware container, cover and set aside at room temperature for 12–24 hours.

Whoopsie, I think someone got a little too excited!

Day 7:
After 12–24 hours your starter should bubble and have a slight sour smell, but more like a lovely fresh yeasty bread dough or a healthy yogurt, not gross or rotten like foul eggs. If it smells in a way that makes you wrinkle your nose, and it tastes disgusting, or anything fuzzy or mouldy has formed on top, you have to start again.
If it smells and tastes pleasantly sour, then everything is fine, and you can now use your starter in recipes, and to "breed" more sourdough.
Or transfer your starter to the refrigerator for storage until needed for a recipe, about 1-2 weeks.
It is alive!


Ready to be stored – or better yet, used for baking!
From this point onward, there will be some maintenance necessary to keep your little sourdough alive and active for years and decades to come. (No more than 2 minutes of work every 1-2 weeks, so don't worry!) Read my guide on maintaining your sourdough starter below.
Now this step is technically optional, but it's something like a tradition to name your sourdough starter!
The official name of my trusty dry sourdough starter is Sir Elliot Puffington The Jovial – although I usually just call him Puffy to be honest 😂 He is named after Shaye Elliott over at The Elliott Homestead who is pretty much known for advocating the dry sourdough starter method and who in turn learnt this method from Carla of Jovial Foods; and also, did you see the day 6 picture?! Pretty puffy!
Sir Elliot Puffington was born on April 9th 2022, and on April 14th 2022 we celebrated his coming of age (i. e. him becoming a mature starter, lol) 🥳

MAINTAINING YOUR DRY SOURDOUGH STARTER
Once you have established your dry sourdough starter, you want to keep it alive and healthy for a looong time (as long as you live, and beyond, if you like!).
I personally only bake bread once a week or once every two weeks, but this feeding ratio also works for daily use. And the biggest advantage is: It doesn't requiredaily any feedings or discards!!
How to feed your dry sourdough starter (no discard):
10-20 g leftover dry sourdough starter
50 g filtered warm water
100 g unbleached flour
Mix. Then pick up the dough with clean and floured hands, working it gently for about 30 seconds.
Place the soft dough ball in a clean glass jar with a lid, and set it aside in a warm room temperature place away from cold drafts for 12-24 hours.
Transfer jar to the fridge. Use sourdough starter as needed.
Refresh again after 1-2 weeks, or once your sourdough starter starts to smell like alcohol / nail polish remover.
If you have more than 10-20 g starter left, you can follow the basic formula of 1 part leftover starter with 1 part water, and 2 parts flour. For example if you have 84 g leftover starter, mix it with 84 g filtered warm water and 168 g unbleached flour. Easy!
I personally only bake bread once a week or once every two weeks, but this feeding ratio also works for daily use. And the biggest advantage is: It doesn't require
How to feed your dry sourdough starter (no discard):
10-20 g leftover dry sourdough starter
50 g filtered warm water
100 g unbleached flour
Mix. Then pick up the dough with clean and floured hands, working it gently for about 30 seconds.
Place the soft dough ball in a clean glass jar with a lid, and set it aside in a warm room temperature place away from cold drafts for 12-24 hours.
Transfer jar to the fridge. Use sourdough starter as needed.
Refresh again after 1-2 weeks, or once your sourdough starter starts to smell like alcohol / nail polish remover.
If you have more than 10-20 g starter left, you can follow the basic formula of 1 part leftover starter with 1 part water, and 2 parts flour. For example if you have 84 g leftover starter, mix it with 84 g filtered warm water and 168 g unbleached flour. Easy!
No matter which method you use, be sure to always keep about 1 tbsp of starter in the jar when using your starter for a recipe. This doesn't need to be exact, but you never want to use all of your starter because then you won't be able to feed and multiply anything.
If you do happen to use up all of your starter for a recipe, you can still save some by letting your sourdough rise, and before you put it in the oven, take a little bit off and put that piece of active sourdough in your jar as a starter which you can now feed. However, I don't recommend relying on that!
Here are some recipes that I've made using this homemade dry sourdough starter:
 various kinds of rustic sourdough bread
 sourdough focaccia and savoury sourdough herb pancakes
 sourdough pizza crust and more sourdough bread
TIPS & NOTES:
- If for some reason your homemade sourdough starter doesn't work out, don't despair! You can either try again until it works (warmer seasons work best for the fermentation process), or you can buy a starter from a good, trustworthy source such as from Etsy or an online company like Cultures For Health. Or you are lucky enough to have a friend or family member who already bakes with sourdough and who might give you a portion of their starter! There is absolutely no shame in getting a starter as opposed to making it yourself :)
- Once you've established your starter, you could make another batch in a different jar which you can keep in your fridge side by side and use in turns, just in case one ever goes bad. You can label it with a wine glass marker so that you know which one is which.
Now go get your sourdough starter going!
Have you made your own sourdough starter before? Which is your favourite method, wet or dry? Let me know!
♥
Maisy


 But for quite a while now I have b...)
0 Comments