Homestead Herbs & Healing | holistic living
  • Start Here
  • Homestead
  • Herbs
  • Healing
  • Recipes
    • Breakfast
    • Main Course
    • Dessert
    • Snack
  • DIY
  • Minimalism
  • About Me
reading time: 2 min

https://be-alice.blogspot.com/2017/08/3-simple-ways-to-make-most-of-your-time.html


The older I get the faster time seems to fly by. Maybe because our days are more structured and we just work our way through them according to our plan. Or maybe because we spend so much time in the digital world rather than the world around us. Either way, we end up losing ourselves in the future or caught up in some virtual reality instead of enjoying the present moment.

Here are three easy-to-adapt habits to make the most of our time.


1. Get out of your head

... and into your body! It's easier said than done. I often talk about "me time" on my blog, and what I mean by that is a time that you devote to connecting with yourself, feeling yourself, paying attention to where you are at, what you need at that very moment. Binge watching your favourite TV shows might satisfy a certain craving of yours, but it's not me time. At all. It's simply another way of getting out of touch with yourself and your environment. 

Instead, do something that evolves your entire body – and not just your mind – such as exercising, crafting, painting, dancing, being in nature, cuddling, writing... I've already made a list of 25 electronic-free activities that might give you some inspiration.


2. Keep a gratitude journal

You probably heard this one a lot: a gratitude journal. This popular practice is said to have great benefits including better sleep, fewer symptoms of illness, and more happiness. The most common way to do this is to simply write down 3-10 things that you are thankful for, from basic things like "family" to more precise things like "the way I managed to handle our stressful meeting today". For an even more specific approach, I suggest answering these three questions each day:
1. What am I grateful for today?
2. What can I do to make today/tomorrow great?
3. An amazing thing that happened today...

A habit as simple as spending 2 minutes each night (or morning) answering these questions will help you appreciate the time you spend and spent. Keep your gratitude journal by your night stand so you will see it before going to sleep and remember to write down your answers for that day.


3. Meditate

So I told you to get our or your head at the beginning. But isn't meditation something that only takes place in your head? Yes and no. While meditation doesn't usually involve any physical activity, its whole purpose is to let go of your thoughts (that automatically lead you into the future or past) and be absolutely present in the moment. 

To make meditating easier, pay attention to your breathing. Find a quiet space and concentrate on the flow of your breath, in and out. When your mind begins to wander, gently bring it back to noticing your breathing.

Meditating for just 3-5 minutes each morning will have a noticeable effect on your mental health, including clarity, awareness, serenity and contentment.

If meditating just isn't your thing, try this simple exercise: three times a day, stop what you're doing for a second and just notice what you've been doing, and how you're feeling. What's happening in your mind while you do your daily work, or while eating? This might take some training, but eventually you will be more aware of what's happening around you – and inside you.


That's it! Like I said, these methods are easy to incorporate into your daily routine – because otherwise they would be pretty useless. So I hope this blog post is helpful for those of you who – like me – want to enjoy every second of their lives! :)


♥

Maisy


reading time: 1 min


This post is for all my ladies (and men) who are tired of waxing, shaving or epilating. Since sugaring is less painful and less dangerous than waxing, this is a great option to get rid of your body hair in a safe and natural way. 

THE BENEFITS OF SUGARING

  • less/no pain
  • less irritation after treatment
  • removing even very short hairs
  • pulling the hair out by the root 
  • reducing hair regrowth 
  • easy to clean up
  • natural ingredients (in fact, the sugar paste is so natural, you could eat it!)
  • vegan

There are two ways to use sugaring wax: with fabric and without. I am going to show you the recipe for both methods, and how to apply it.


https://be-alice.blogspot.com/2017/08/weekly-meal-plan-cw-33.html


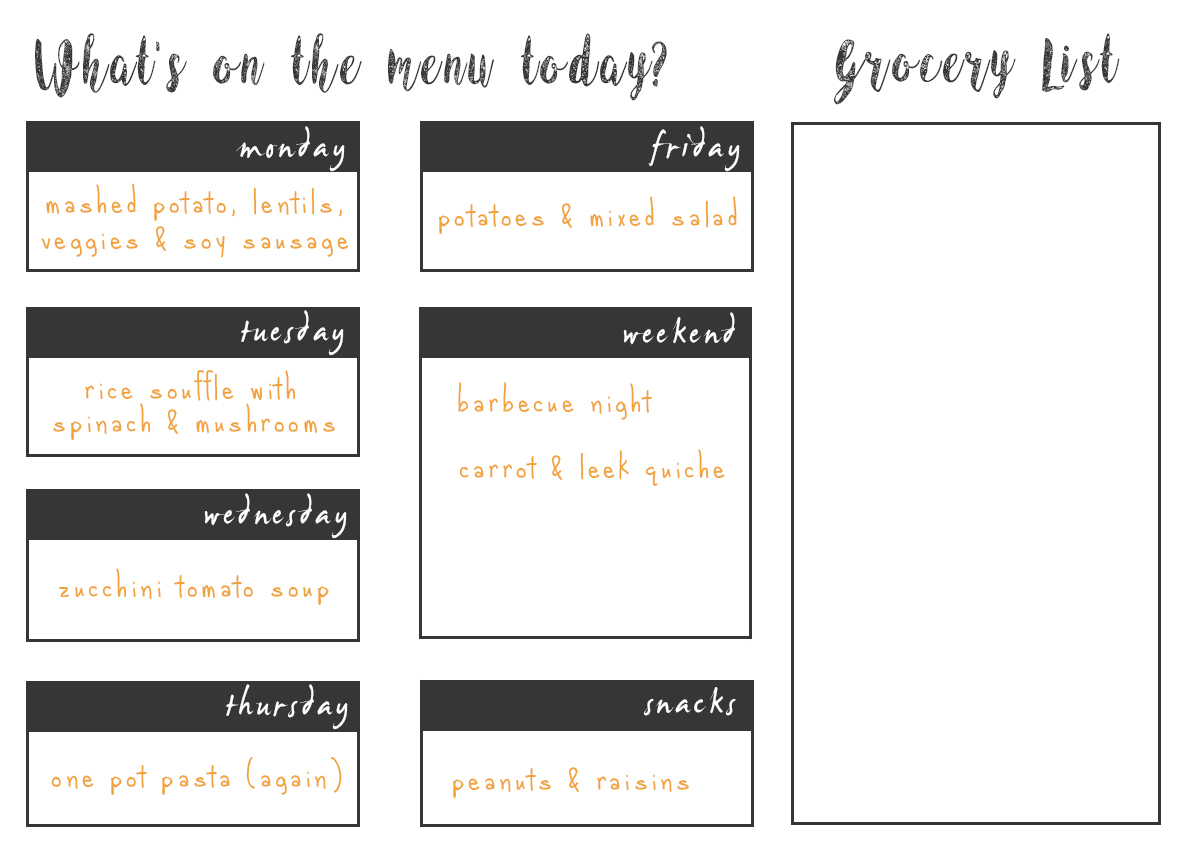
Hello food friends,

my boyfriend and I have been cooking together again, and it's been tasty as always – if I do say so myself ;) We also decided to do another 21 day sugar-free and oil-free challenge because we both felt like we needed a break from all the sugar and fat we've been eating lately. Here's what we eat last week!


IT'S PARTY TIME!

This week I'm featuring Mary's incredibly easy to make and effective Beeswax Furniture Polish over on The Boondocks Blog. Mary is not only one of the most kind-hearted people on the internet, but also a Greek-bound queen of furniture and household projects! 

Here are some other favourite of the week:

  • This super easy and gelatin-free 10 minute raspberry jam recipe that doesn't require any pectin nor sugar
  • Lisa's tutorial for homemade lavender essential oil extract that must smell amazing!
  • Kerianne's four simple rules for the perfect flower arrangement (I'm really into bouquets lately)
  • This absolutely scrumptious looking caramel blondie blizzard that is gluten-free and top 8 allergy-free
  • A super unhealthy but super good looking caramel corn recipe
  • These depressingly accurate comics about how our life changes after 25 (and I'm just about to turn 26!!)
  • As well as these 14 amusing cartoons about challenges that every woman can relate to – and basically ANYTHING drawn by Cassandra Kalin, she's amazing!
  • And this guide on how to clean & disinfect your refrigerator in 20 minutes – because let's be honest, I really need to do this again...
Now enough with the links, let's smash this party!


Please support and follow our lovely blog party hostesses:

Jerri at Simply Sweet Home - Twitter | FB | G+ | Pin | Inst
Maisy at Becoming Alice - FB | G+ | Pin
Sheree at Stage Presents - Twitter | FB | Pin | Inst | Inst
Lisa at Condo Blues - Twitter | FB | G+ | Pin | Inst
Amy at A Day of Small Things - Pin
Penny at Penny's Passion - Twitter | FB | G+ | Pin | Inst
Kelly at Under a Texas Sky - Twitter | FB | G+ | Pin | Inst | BL

If you are featured this week, be sure and grab a featured button for your blog!


You can show your love for this week's favorites by going over and commenting on the posts and by pinning or sharing!
And if you love all of this week's favorites, please pin, share, and invite your friends to this week's linky party!


https://be-alice.blogspot.com/2017/08/weekly-meal-plan-cw-32.html


Hello there,


this time my boyfriend and I decided to make an "experiment" and not cook together for a week. Instead, we each made what we were in the mood for that day and just sat down to eat together. So here is what I cooked for myself.


IT'S PARTY TIME!


In honour of my early blogging days I'm featuring this recipe for Chocolate Peanut Butter "Nice" Cream from Busy Being Jennifer that seriously got me craving nice cream – and peanut butter – and chocolate!!

Here are some other favourites of the week:
  • This nerdy R2-D2 shelf that would make for the perfect homemade gift for some of my geeky friends and relatives. Love it!
  • Look at those cute denim tin can planters, aren't they just adorable?! Plus, they are another recycling/upcycling project, so yay for that!
  • Speaking of recycling, here are 10 awesome ways to reuse old glass jars that are easy to make, pretty to look at and very useful!
  • If you own a dehydrator and like spicy food, this DIY hot chili powder tutorial is the one for you. I wish I had a dehydrator...
  • This recipe for zucchini sauce with pasta is perfect for lazy chefs like me ;)
  • My boyfriend and I recently re-discovered the greatness of cooked and grilled corn (with vegan butter and herbed salt – sooo good!), so here's a great post on how to make grilled corn on the cob for those summery barbecue nights.
  • Last, but not least, I'm in love with this virgin white sangria that is not only kid-friendly but also a great option for those adults that don't enjoy alcohol, like me :)

Let's get this party started!


Please support and follow our lovely blog party hostesses:

Jerri at Simply Sweet Home - Twitter | FB | G+ | Pin | Inst
Maisy at Becoming Alice - FB | G+ | Pin
Sheree at Stage Presents - Twitter | FB | Pin | Inst | Inst
Lisa at Condo Blues - Twitter | FB | G+ | Pin | Inst
Amy at A Day of Small Things - Pin
Penny at Penny's Passion - Twitter | FB | G+ | Pin | Inst
Kelly at Under a Texas Sky - Twitter | FB | G+ | Pin | Inst | BL

If you are featured this week, be sure and grab a featured button for your blog!


You can show your love for this week's favorites by going over and commenting on the posts and by pinning or sharing!
And if you love all of this week's favorites, please pin, share, and invite your friends to this week's linky party!

reading time: 5 min


My boyfriend's cousin got married last Saturday, and my boyfriend and his sister took it upon themselves to make the wedding cake. Yes, you read that right. You can make your own wedding cake. Or your cousin's. It was clear from the beginning that it was going to be a multi-flavoured cake, so a different flavour for every tier, because we loved the idea of giving people options. 

We ended up doing three rather basic flavours: nut cake with marzipan filling, chocolate cake with chocolate filling (for those chocoholics, hehe), and lemon cake with raspberry filling, all covered with chocolate ganache frosting and fondant icing, and decorated with turquoise fondant roses. Oh, and we ended up making it all vegan because the bride loved the vegan layer when we rehearsed the cake for the first time. It was GREAT! (if I do say so myself) Everybody loved it, and I'm so proud of my boyfriend and his sister for what they managed to do :)

Making a wedding cake for a friend can feel risky (what if you mess up?!), but it's really doable, especially if you have some basic baking experience. It tastes 10 times more delicious than a bought cake and makes for a great wedding gift. And it's budget-friendly, too! 

Here's a step-by-step tutorial on how to make your own three tier (vegan) wedding cake.


THREE TIER VEGAN WEDDING CAKE

Preparation time: 2 days to prep and decorate
Main ingredients: flour, sugar, chocolate, soy cream, fondant
difficulty level: moderate-challenging
makes: one 3-tiered wedding cake
suitable for: vegan, lactose-free, low-sodium

Ingredients

Bottom tier (28cm): nut marzipan :

370g white flour, sieved
50g almond flour, sieved
2 packages (30g) baking soda, sieved
2 tbsp cornstarch, sieved
240g sugar
2 packages (16g) vanilla sugar
3 tbsp orange peel
170ml sunflower oil, canola oil or melted coconut oil
420ml sparkling water

x2

Bottom filling:
200g raw marzipan

Middle tier (20cm): double chocolate :

250g white flour, sieved
65g raw cacao powder, sieved
1 1/2 packages (22g) baking soda, sieved
1 1/2 tbsp cornstarch, sieved
180g sugar
1 package (8g) vanilla sugar
2 tbsp orange peel
128ml sunflower oil, canola oil or melted coconut oil
315ml sparkling water 

Middle filling:
1 cup chocolate spread

Top tier (15cm): lemon raspberry :

210g white flour, sieved
1 package (15g) baking soda, sieved
1 tbsp cornstarch, sieved
120g sugar
1 package (8g) vanilla sugar
juice and peel of 1 organic lemon
85ml sunflower oil, canola oil or melted coconut oil
120ml sparkling water 

Top filling:
1/2 cup raspberry jam

Ganache:
1 litre of soy cream
1 kg of dairy-free dark or semisweet couverture chocolate, chopped

Fondant:
3 x 450g rolled fondant
200g turquoise fondant

Also:
10 thick straws such as milkshake straws
2 cardboard circles in the shape of middle and top cakes
cling wrap

Instructions

ON DAY 1: MAKING THE CAKES :

Preheat oven to 175°C / 347°F. 

In a medium large bowl, sieve together flour, almond flour, baking soda and cornstarch. Add sugar, vanilla sugar and orange peel. Whisk well. Gently fold in oil and sparkling water, don't whisk! Use a spatula to fold everything in. Don't worry about little lumps, they will dissolve while baking.

Grease your 28cm spring form and spread the batter into the pan. Place into the preheated oven, and bake for about 25-30 minutes, or until a toothpick inserted in the centre of the cake comes out clean. Be careful as this is a sponge cake and therefore super fluffy and soft.

We actually decided to make two cakes for the bottom layer because they turned out rather flat. So just double the recipe above.

Repeat the same process for the other two cakes. 

We took out the 15cm spring form after about 30 minutes of baking, and the 20cm spring form cake after 40 minutes (it was very moist).


MAKING THE GANACHE FROSTING:

While the cakes are cooling, prepare the chocolate ganache. Add 1 litre of soy cream to a saucepan and gently heat until hardly simmering. Switch off the heat and add your chopped chocolate to the warm cream. Allow to melt while occasionally stirring with a whisk. Place in the fridge overnight.


ON DAY 2: FILLING AND COVERING THE CAKES :

Carefully cut the sponge cakes in half horizontally, using a pie cutter or a long serrated knife. Since we baked two cakes for the bottom layer, those didn't have to be cut.

Evenly spread your desired fillings – in our case: rolled out marzipan for the bottom tier, a thick layer of homemade chocolate spread for the chocolate layer, and a thin layer of store-bought raspberry jam for the top tier – over the bottom cake halves. Turn the upper halves upside down (so that the even side is up) and re-stack onto the bottom halves. 


Cut out two circles of cardboard with the same diameters of our middle and top cake layers, so 20cm and 15cm. Wrap each circle in cling wrap to prevent the cardboard from absorbing moisture from the cake. Now place each cake on its cardboard surface. This will be part of our stacking support.

Remove the hardened chocolate ganache from the fridge and beat until fluffy and creamy. Using a palette knife, a butter knife or a spatula, spread about half of the ganache over the bottom tier cake. This is done to a) create a sticky base for the fondant icing, and b) even out any imperfections in the cakes. Try to get the surface as smooth as possible, and to create nice sharp edges on your cake. A rotating cake stand really helps with this.


Put the frosted cakes into the refrigerator for 30 minutes for the ganache to harden slightly.

LAYERING AND DECORATING THE CAKES :

Make sure your work surface and your cake stand are clean, as any spots such as from the ganache will leave an ugly discolouration on the fondant. Dust the work surface with icing sugar and roll the ready-to-roll fondant into a circle big enough to cover the cake top and sides, with a little excess. Do not lift or flip the fondant over, as this may cause it to rip.

Lift the fondant over the cake (you can use a rolling pin for this) and gently position on the cake. Smooth the fondant over the cake, starting at the top and stroking down the sides with your fingers to remove any folds, wrinkles or air bubbles. If an air bubble appears, insert a pin on an angle, release air and smooth the area again. Using a knife, trim off any excess fondant – but make sure no ganache is visible.


Place the bottom cake on its designated cake stand or tray. In the centre of your bottom cake, insert a thick straw all the way down into the cake till it hits the bottom. Cut the straw with a scissor where it is flush with the top of the cake. Using the cut off piece of straw as reference, cut four more straws the same length and insert them within the diameter of the middle cake, using a ruler. For instance, if your middle cake is a 7 inch cake, you will be placing your straws within a 7 inch diameter.


Cover the middle cake with fondant and place onto the straw-studded bottom cake. Thanks to the straws and the cardboard support, you'll provide an even platform for the next cake to sit on, even if the cake below is a bit wonky, and prevent the cakes from sinking in.

Insert five straws in the middle cake within the diameter of the top cake, trim off the excess, and place the top cake on top (top!). As you can tell by the pictures, we decided to go for a slightly asymmetrical stacking, so we had to keep this in mind when inserting the straws and stacking the cakes.


Lastly, decorate your cake. In our case, we went with the turquoise theme of the wedding and made our own fondant roses (like so) as well as a yin & yang symbol because the bridal couple have a matching yin & yang tattoo. We also wrapped a turquoise ribbon around each layer of cake, using a spot of fondant on the ribbon to secure it to itself. This is a great way to hide any imperfections between the cake layers ;)


We also decided to use the remaining fondant to cover the cake tray and create the illusion of a fourth tier.

Store cake in the refrigerator or freezer until ready to serve – in our case at midnight. And remember to take off the ribbon and take out the straws before serving!!


♥

Maisy


https://be-alice.blogspot.com/2017/08/weekly-meal-plan-cw-31.html


Hi everyone!


Man, I'm way too stressed right now. My bags are semi-packed, I need to publish this blog post, and my boyfriend and I are about to get picked up any minute to drive to his grandma's because tomorrow is his cousin's wedding and we still have to finish her wedding cake... yeah. To be honest, last week was a struggle to come up with recipes while being so busy with 10 other things, but here's what we ended up cooking & eating. Enjoy!

https://be-alice.blogspot.com/2017/08/friday-favorites-week-385.html

IT'S PARTY TIME!

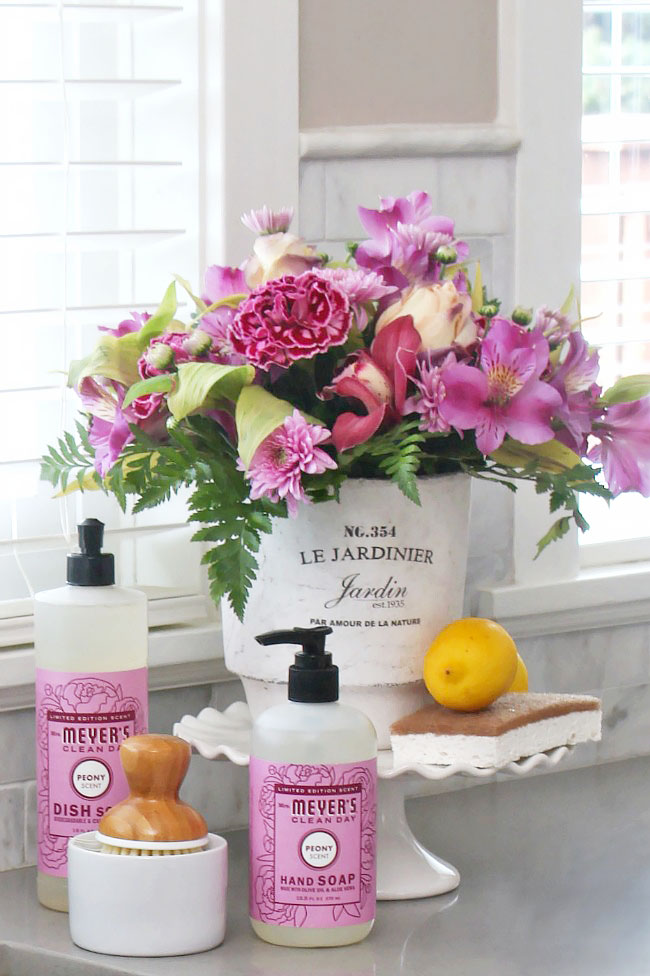
Hello there party people, and welcome back to the Friday Favorites weekly feature round! I have been busy writing job applications for the past few days, and tomorrow is my boyfriend's cousin's wedding! Eeek. Exciting! Since weddings always remind me of floral arrangements, and since I'm really bad at keeping cut flowers alive, I am sharing How To Make Cut Flowers Last Longer from Clean and Scentsible this week! Don't her bouquets look amazing?

Here are some other favourites of the week:
  • This vegan no-bake cherry blueberry crisp by Vegan Richa looks sooo delicious, and it doesn't even require an oven for this recipe! I need to try this.
  • Here are 17 Comic Strips about the Not-So-Simple Life of a Woman that are hilariously true!! Especially the one about PMS and the half-bun hairstyle, lol.
  • Have you ever heard of Cucumber Bread?! Well, I haven't but the idea of this sounds super cool, so check out the recipe if you're interested.
  • I almost featured this Moroccan Spiced Mint Tea Julep but then didn't because I realized it had alcohol in it, and I really don't like alcohol... (sorry Brandie!) But the photos look really nice, and if you like booze, this might be for you!
  • Stacie's recipe for Lemon Roasted Potatoes really got me craving potatoes (weird, I know). This will go on my recipe list.
  • Last, but certainly not least, I found Sadia's video on How I Cut & Layer My Hair At Home super helpful, so I had to share it with you! I usually cut my hair at home, but not as professionally as she does :)

Now let's get this party started!


Please support and follow our lovely blog party hostesses:

Jerri at Simply Sweet Home - Twitter | FB | G+ | Pin | Inst
Maisy at Becoming Alice - FB | G+ | Pin
Sheree at Stage Presents - Twitter | FB | Pin | Inst | Inst
Lisa at Condo Blues - Twitter | FB | G+ | Pin | Inst
Amy at A Day of Small Things - Pin
Penny at Penny's Passion - Twitter | FB | G+ | Pin | Inst
Kelly at Under a Texas Sky - Twitter | FB | G+ | Pin | Inst | BL

If you are featured this week, be sure and grab a featured button for your blog!


You can show your love for this week's favorites by going over and commenting on the posts and by pinning or sharing!
And if you love all of this week's favorites, please pin, share, and invite your friends to this week's linky party!


https://be-alice.blogspot.com/2017/08/weekly-meal-plan-cw-30.html


Hi everybody!


I know, I know, I totally failed at continuing my weekly meal plan series after returning from Vietnam... but here it is! My overview of everything my boyfriend and I cooked last week! :) And I really hope I will manage to upload my meal plan on a regular weekly basis again from now on!


IT'S PARTY TIME!

Hi guys, and welcome to another round of Friday Favorites! This week I'm featuring these cute DIY charcoal milk bottle candles from Living La Vida Holoka – the "milk" version is my favourite. Why not pair them with these ultimate chewy chocolate chip cookies from Vegan Chow Down that happen to be vegan?!

Here are some other favourites of the week:
  • This Lavender Iced Tea by my co-host Lisa looks amazing and perfect for summer!
  • Did you know that you could make your own Onion Relish at home with nothing but onions, sugar and vinegar?
  • Here are some Easy Upcycled DIYs for budget friendly (and environment friendly) decorating!
  • Speaking of DIYs, Lisa also shows us How to Sew an Easy One Seam Sundress in an hour or less!
  • If you aren't only into crafting, but also making your own beauty products, here is a great guide on Keeping Your DIY Products Safe.
  • And last but now least, I wanted to share these 5 Simple Relationship Truths with you to remind ourselves that popular romanticized expectations have little to do with reality.

And now, it's time to party! 


Please support and follow our lovely blog party hostesses:

Jerri at Simply Sweet Home - Twitter | FB | G+ | Pin | Inst
Maisy at Becoming Alice - FB | G+ | Pin
Sheree at Stage Presents - Twitter | FB | Pin | Inst | Inst
Lisa at Condo Blues - Twitter | FB | G+ | Pin | Inst
Amy at A Day of Small Things - Pin
Penny at Penny's Passion - Twitter | FB | G+ | Pin | Inst
Kelly at Under a Texas Sky - Twitter | FB | G+ | Pin | Inst | BL

If you are featured this week, be sure and grab a featured button for your blog!


You can show your love for this week's favorites by going over and commenting on the posts and by pinning or sharing!
And if you love all of this week's favorites, please pin, share, and invite your friends to this week's linky party!
Newer Posts Older Posts Home

THIS IS ME

Well, hello! My name is Maisy (pronounce: macy) and I’m the creative spirit behind this blog. You are welcome to join me on my journey to a more natural, slow-paced & healthier life!

SUBSCRIBE & FOLLOW

TRENDING THIS MONTH

  • DIY Easy Electroculture Plant Antenna
  • How To Marie Kondo Your Life (and not just your stuff)
  • Hot Wintry Butterbeer (vegan)
  • DIY Hair Growth Oil
  • DIY Yoni Oil | Feminine Hygiene Care

Categories

  • Ayurveda 17
  • beauty 39
  • breakfast 69
  • dessert 207
  • diy 48
  • fermenting 8
  • fictional food 21
  • foraging 30
  • gardening 8
  • gluten-free 115
  • healing 71
  • herbs 27
  • homestead 114
  • main course 35
  • minimalism 39
  • snack 106
  • sugar-free 110
  • zero waste 44
Powered by Blogger.

Archive

  • ►  2024 (3)
    • ►  September (1)
    • ►  March (1)
    • ►  January (1)
  • ►  2023 (22)
    • ►  December (2)
    • ►  November (1)
    • ►  August (1)
    • ►  July (1)
    • ►  June (1)
    • ►  May (4)
    • ►  April (3)
    • ►  March (3)
    • ►  February (3)
    • ►  January (3)
  • ►  2022 (65)
    • ►  December (5)
    • ►  November (3)
    • ►  October (5)
    • ►  September (5)
    • ►  August (6)
    • ►  July (6)
    • ►  June (4)
    • ►  May (6)
    • ►  April (5)
    • ►  March (7)
    • ►  February (7)
    • ►  January (6)
  • ►  2021 (59)
    • ►  December (5)
    • ►  November (6)
    • ►  October (6)
    • ►  September (8)
    • ►  August (6)
    • ►  July (7)
    • ►  June (5)
    • ►  May (5)
    • ►  April (4)
    • ►  March (3)
    • ►  February (3)
    • ►  January (1)
  • ►  2020 (22)
    • ►  December (1)
    • ►  July (1)
    • ►  June (4)
    • ►  May (6)
    • ►  April (1)
    • ►  March (2)
    • ►  February (5)
    • ►  January (2)
  • ►  2019 (21)
    • ►  December (2)
    • ►  October (4)
    • ►  September (4)
    • ►  August (3)
    • ►  June (2)
    • ►  April (2)
    • ►  March (1)
    • ►  February (1)
    • ►  January (2)
  • ►  2018 (68)
    • ►  December (1)
    • ►  November (2)
    • ►  October (1)
    • ►  September (4)
    • ►  August (2)
    • ►  July (10)
    • ►  June (4)
    • ►  May (5)
    • ►  April (8)
    • ►  March (12)
    • ►  February (8)
    • ►  January (11)
  • ▼  2017 (154)
    • ►  December (13)
    • ►  November (10)
    • ►  October (35)
    • ►  September (13)
    • ▼  August (11)
      • 3 Simple Ways To Make The Most Of Your Time
      • DIY Sugaring Wax + How To Use It (2 Ways)
      • Weekly Meal Plan CW 33
      • Friday Favorites - Week 387
      • Weekly Meal Plan CW 32
      • Friday Favorites - Week 386
      • Vegan Three Tier Wedding Cake
      • Weekly Meal Plan CW 31
      • Friday Favorites - Week 385
      • Weekly Meal Plan CW 30
      • Friday Favorites - Week 384
    • ►  July (9)
    • ►  June (1)
    • ►  May (13)
    • ►  April (13)
    • ►  March (16)
    • ►  February (11)
    • ►  January (9)
  • ►  2016 (97)
    • ►  December (9)
    • ►  November (13)
    • ►  October (8)
    • ►  September (12)
    • ►  August (9)
    • ►  July (13)
    • ►  June (9)
    • ►  May (6)
    • ►  April (6)
    • ►  March (3)
    • ►  February (5)
    • ►  January (4)
  • ►  2015 (70)
    • ►  December (5)
    • ►  November (2)
    • ►  October (2)
    • ►  September (7)
    • ►  August (2)
    • ►  July (24)
    • ►  June (6)
    • ►  May (5)
    • ►  April (4)
    • ►  March (8)
    • ►  February (4)
    • ►  January (1)
  • ►  2014 (38)
    • ►  December (2)
    • ►  November (1)
    • ►  October (2)
    • ►  August (2)
    • ►  July (14)
    • ►  June (3)
    • ►  May (3)
    • ►  April (6)
    • ►  March (2)
    • ►  February (3)
  • ►  2013 (7)
    • ►  December (2)
    • ►  October (1)
    • ►  September (3)
    • ►  June (1)

SEARCH THIS BLOG


total page views

Most Popular Posts

  • DIY Easy Electroculture Plant Antenna
  • How To Marie Kondo Your Life (and not just your stuff)
  • Hot Wintry Butterbeer (vegan)

Privacy Policy


Copyright © Homestead Herbs & Healing | holistic living. Designed by OddThemes